cdn_olds_94 Posted September 27, 2014 Report Posted September 27, 2014 Is it as hard as it looks, or is there a easier way of going about it. I got as far as removing everything up to the brakes before the bugs got too much for my son and I. What a stupid place to put the alternator. Quote
carkhz316 Posted September 27, 2014 Report Posted September 27, 2014 Agreed on the silly placement. There's a write-up somewhere on here for easy R&R. This biggest point I can remember and mention for you to do, is to pull the two cradle bolts on the passenger side, and lower the cradle to give yourself enough room to take it out like that. I did mine in about 2 hours from start to finish doing it like that having never done one on the 3.4 prior to that. Quote
Schurkey Posted September 28, 2014 Report Posted September 28, 2014 The only time I put an alternator on a 3.4, I had the rear head removed for head-gasket replacement. Super easy with the head and exhaust out of the way. That probably doesn't help you much, though. Quote
55trucker Posted September 28, 2014 Report Posted September 28, 2014 The *regular* course of action is to remove the passenger wheel, remove the rubberized splash shield from the frame rail, disconnect the stabilizer bar, disconnect the lower ball joint, remove the right side axle shaft nut, loosen off the three strut nuts at the top of the strut, using a lever swing the control arm down & free the strut from the ball joint & axle shaft, tie off the strut to keep it swung out of the way assuming you don't want to remove the caliper to remove the strut entirely, remove the right side axle shaft, remove the right side axle shield from the trans housing, now with all of that *fun stuff* out of the way you can go after the alternator itself..... which year is yours? if it's a 91 then there is also a rubber cooling hose wrapped in insulation held by a bracket feeding the back side of the alternator's regulator that has to be removed as well, later models make use of a plastic cooling snorkel that pokes the inlet down under the sub frame. *are you having fun yet?* Quote
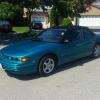
cdn_olds_94 Posted September 29, 2014 Author Report Posted September 29, 2014 The *regular* course of action is to remove the passenger wheel, remove the rubberized splash shield from the frame rail, disconnect the stabilizer bar, disconnect the lower ball joint, remove the right side axle shaft nut, loosen off the three strut nuts at the top of the strut, using a lever swing the control arm down & free the strut from the ball joint & axle shaft, tie off the strut to keep it swung out of the way assuming you don't want to remove the caliper to remove the strut entirely, remove the right side axle shaft, remove the right side axle shield from the trans housing, now with all of that *fun stuff* out of the way you can go after the alternator itself..... which year is yours? if it's a 91 then there is also a rubber cooling hose wrapped in insulation held by a bracket feeding the back side of the alternator's regulator that has to be removed as well, later models make use of a plastic cooling snorkel that pokes the inlet down under the sub frame. *are you having fun yet?* Well, it's finished ! 4 hours total repair time. I'll say it again, what a stupid, stupid place for an alternator. Oh yea, I own a 94 Cutlass vert. Quote
Psych0matt Posted September 29, 2014 Report Posted September 29, 2014 Well, it's finished ! 4 hours total repair time. I'll say it again, what a stupid, stupid place for an alternator. Oh yea, I own a 94 Cutlass vert. What method did you end up doing? Quote
cdn_olds_94 Posted September 30, 2014 Author Report Posted September 30, 2014 I went the remove everything route. Striped out brakes, strut, rubber splash guards, dropped the lower A arm, removed the half-shaft and then the alternator. It came apart easy and went back together with no problems. Quote

Recommended Posts
Join the conversation
You can post now and register later. If you have an account, sign in now to post with your account.