
Leaderboard

Popular Content
Showing content with the highest reputation since 03/22/2025 in Posts
-

Fast Forward Performance. FFP
Bake82 and 3 others reacted to AWeb80 for a topic
Update. the 9.6121 pads work perfectly. I sprayed them down with silicone during install and not a peep or a squeak out of anything.4 points -
TRW Keyless Entry module
White93z34 and 2 others reacted to 55trucker for a topic
In the GP it's mounted to the topside of the right rear parcel shelf next to the speaker.3 points -

TRW Keyless Entry module
primergray and 2 others reacted to Black92GS for a topic
Is it a coupe? In my Regal, it’s behind the passenger side rear interior panel. I believe all of the 1st gen coupes, save for the convertibles have them in a similar location. It’s roughly behind the red circle.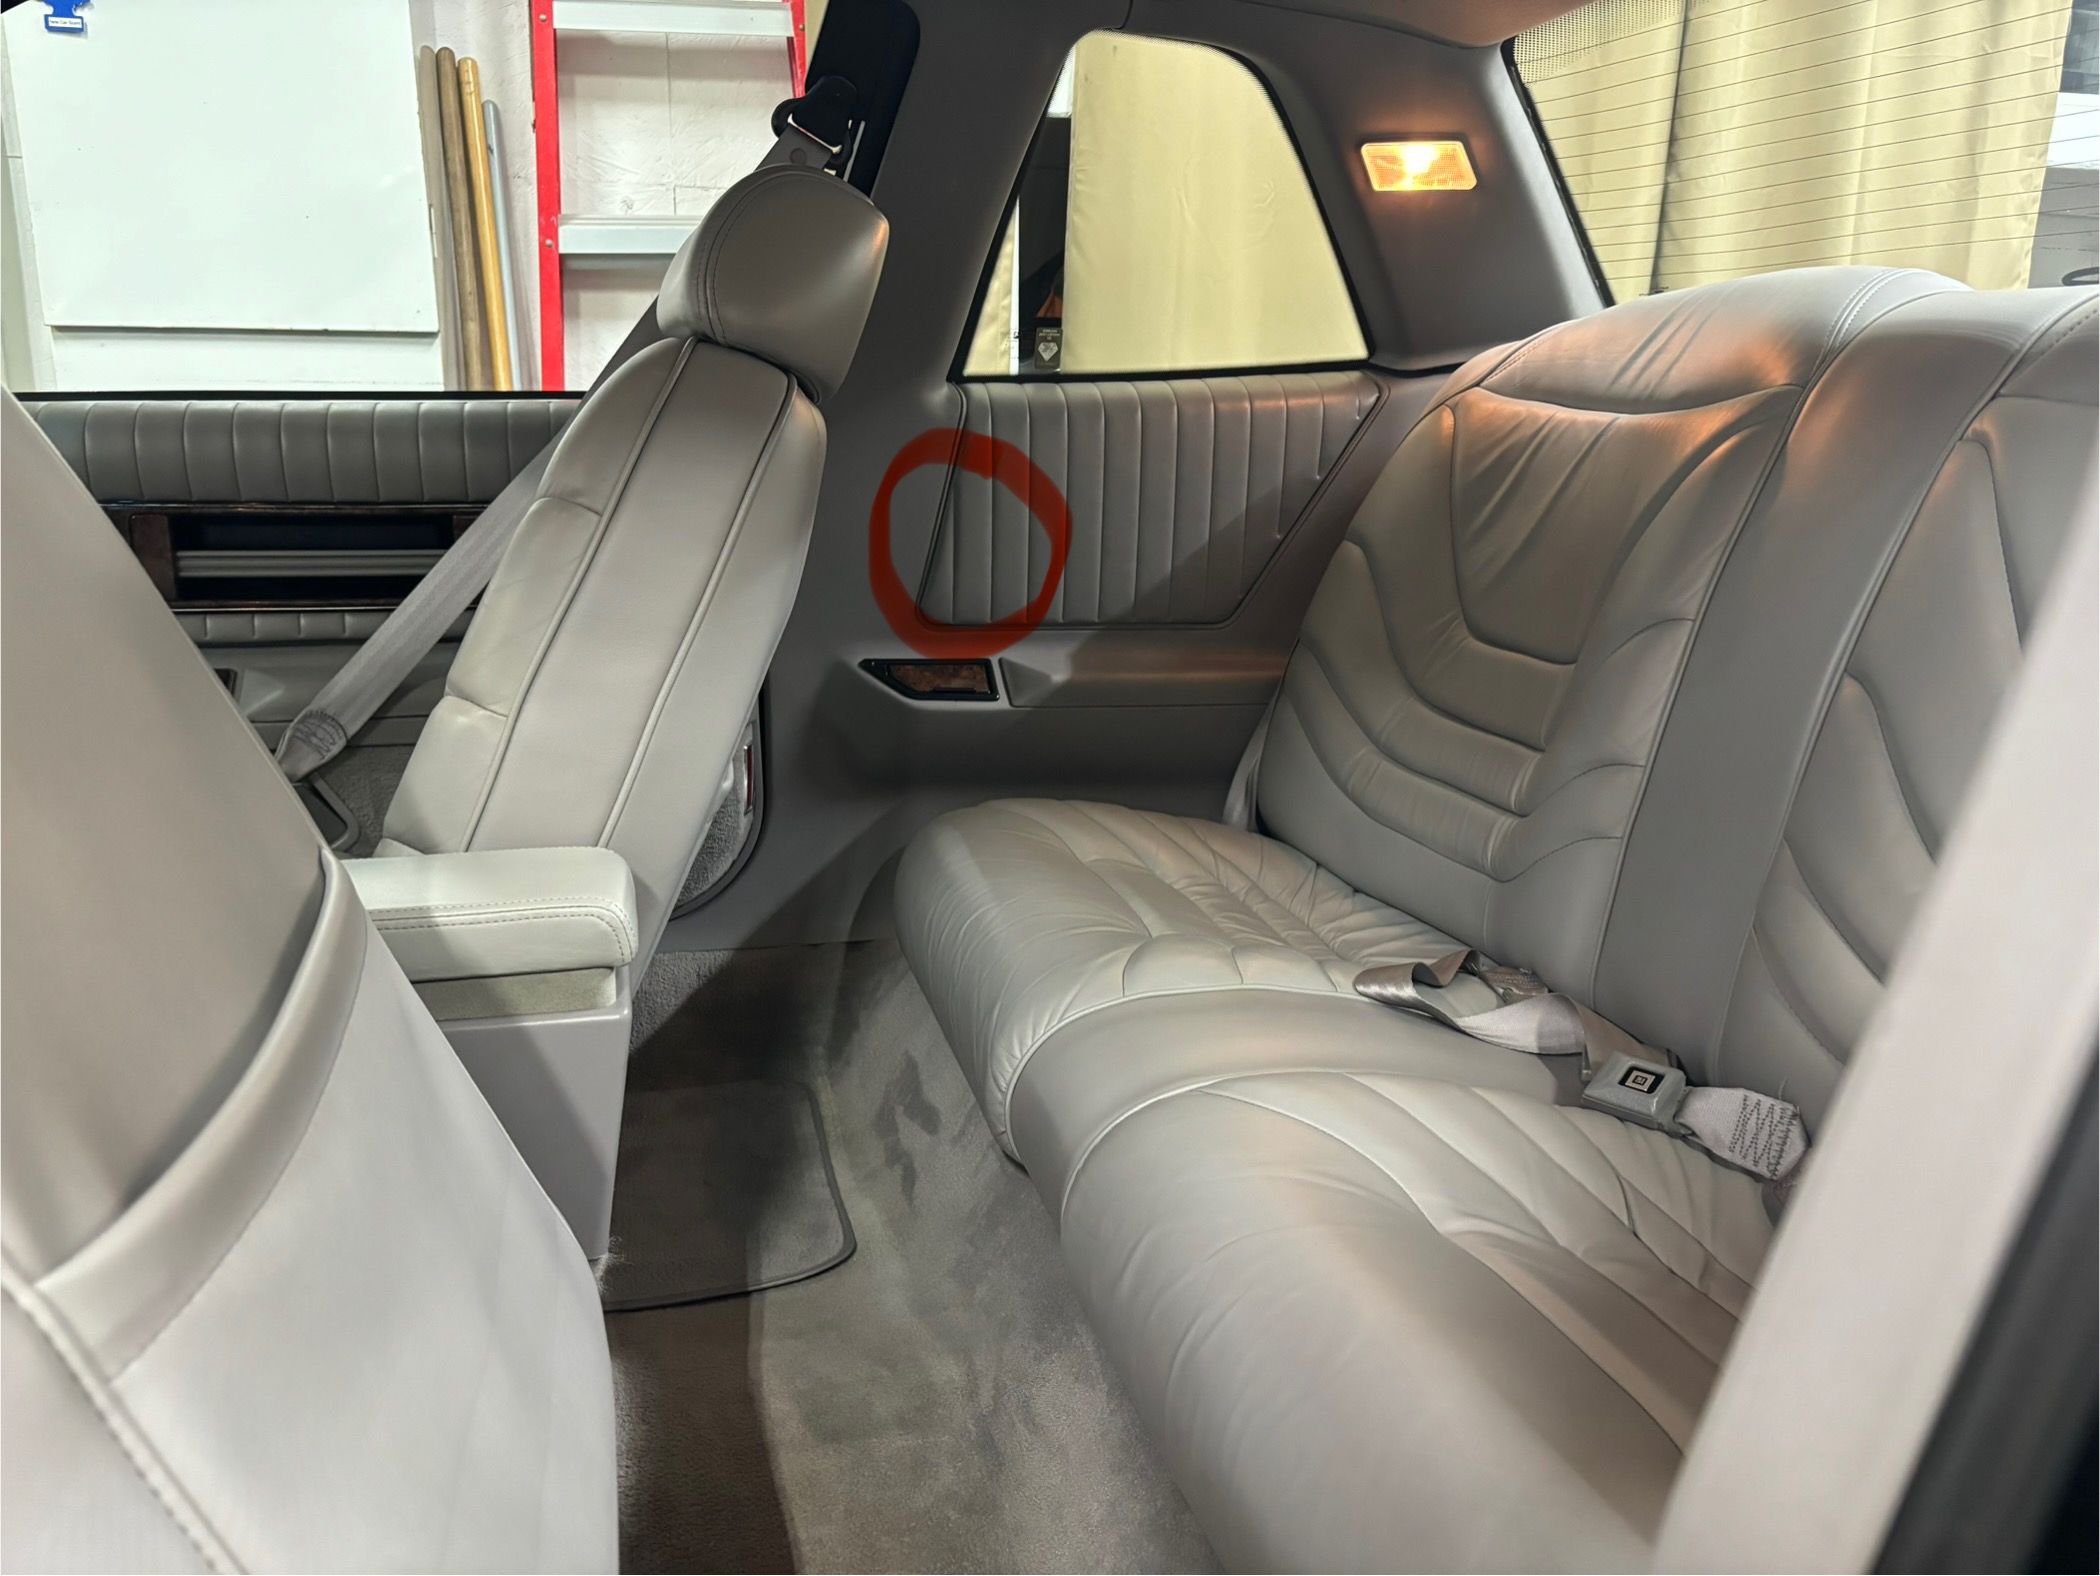 3 points
 -

`89 TGP joining the collection
pwmin and one other reacted to rich_e777 for a topic
She dont look like much kid but she's got it where it counts...2 points -
Grand Prix GTP
GnatGoSplat and one other reacted to crazyd for a topic
What about this?
 2 points
 -

Bluetooth Module DIY
SuperBuick and one other reacted to White93z34 for a topic
Not able to give a great step by step one because last time I did it was awhile ago. and the radios differ so much inside from radio to radio. Last one I did was the 5 band EQ tape deck in my IROC. I found the Left and right audio signals coming from the tuner to the amplifier and severed them, got a small 6 conductor wire, and snaked it out and through the console to a ON-ON switch in the console. one position lets the radio pass through as usual, the other lets the bluetooth module interrupt and go to the amplifier instead. I stuffed the bluetooth module inside the radio itself and its powered by the power switch of the radio so its truly hands off. Been working well for awhile now. So basically I broke out the right and left tuner from going into the amplifier, brought those along with the BT out left/right and another set of wires going back to the tuner so I can still keep factory functionality.2 points -
TRW Keyless Entry module
primergray reacted to Black92GS for a topic
Nope….a couple screws, pull a couple interior pieces and it’s right there. I figured all the coupes would be similar, but you know….. GM. I had tried fixing mine last summer, but I really needed a better soldering iron. I had managed to get it working for a bit though. I traced it back to a bad solder joint on one of the pins where the vehicle side wiring harness plugs in. I could wiggle the connector slightly and get it working. I’ve since gotten better soldering equipment, redid those connections over the weekend….and now it’s back to not working at all. I’m sort of apprehensive to try again though, as the driver side power door lock actuator goes through the RKE module, even when using the door switches. If I screw something up…I don’t want to lose my power locks altogether. Since it’s not a daily, I’ll likely leave well enough alone for now.1 point -
Power steering whine
rich_e777 reacted to crazyd for a topic
I've been working on this for the last four days, and it took over 120 cycles (what the manual says could be "several" but I lost count) of back-and-forth rotation to get it to where there were no more air bubbles and the pump was finally quiet again. Determined to fix this once and for all, I had gotten an OEM pump off a junkyard Z34 and installed it, then proceeded with the bleeding procedure in cycles of 10 at a time. I've replaced the pump at least three times before over the years, and have tried the cold-weather fluid as well. Nothing has ever worked and most things just made it worse, because the problem all along has been pump cavitation from air in the system that I never knew the right way to bleed it out.1 point -
TRW Keyless Entry module
94 olds vert reacted to mdpierce8 for a topic
Appreciate the response. I’ll see what I can do this weekend.1 point -
Power steering whine
rich_e777 reacted to crazyd for a topic
So I know it has been a while, but in case this is still a problem for anyone and for future reference, I found that I have been doing the bleeding procedure incorrectly - and most of the YouTube instructional videos are too. I found the proper procedure in the FSM and I'm posting it here. BLEEDING THE POWER STEERING SYSTEM After replacing the fluid or servicing the power steering hydraulic system, you must bleed air from the system. Air in the system prevents an accurate fluid level reading, causes pump cavitation noise and over time could damage the pump. To bleed the power steering system, proceed as follows: 1. Begin with the engine off, front wheels off the ground. and wheels turned all the way to the left. 2. Add either standard power steering fluid or optional cold climate fluid, to the "FULL COLD" mark on the fluid level indicator. Refer to MAINTENANCE AND LUBRICATION (SECTION OB) for information on power steering fluids. 3. Bleed the system by turning the wheels side to side without hitting the stops. ! Important This may require turning the wheels from side to side several times. Keep the fluid level at the "FULL COLD" mark. Fluid with air in it has a light tan appearance. This air must be eliminated from the fluid before normal steering action can be obtained. Start the engine. With the engine idling, recheck the fluid level. If necessary, add fluid to bring the level to the "FULL COLD" mark. 5. Return the wheels to the center position. Lower front wheels to the ground. Continue running the engine for two or three minutes. 6. Test the vehicle to be sure the steering functions normally and is free from noise. ! Important Inspect for fluid leakage at connection points along the power steering system. 7. Recheck the fluid level as described in Steps 3 and 4 except that the fluid level should now be up to the "FULL HOT" mark after the system has stabilized at its normal operating temperature.1 point -

TRW Keyless Entry module
mdpierce8 reacted to 94 olds vert for a topic
I could be wrong this was a long time ago. In my 1991 Grand prix my keyless entry did not work at all. Figured out the relay was getting power but not doing anything. If I recall it is under the rear package tray? I remember getting in the trunk at one point, but that could have been my convertible. I did also remove my rear interior panels, but can't remember if it was for the keyless entry module. Once you find it, just open it up and look for bad solder joints and touch them up. That's how I fixed mine.1 point -
convertible carpeting
94 olds vert reacted to rich_e777 for a topic
Now how about some actual measurements? Did what I could, where I thought I should. Found a few things I will do my best to articulate. Because of the rear seat reinforcement on the Verts... It makes this measurement about 1 1/2 inches shorter when measuring to the very peak of that hump than on the coupe. That will affect the way the carpet lays as well as...1 point -
convertible carpeting
94 olds vert reacted to rich_e777 for a topic
I attempted at least 6 videos but I suck at making them. I don't even know what I was trying to say. I`m 100% convinced that the coupe carpet is trimmed into place as it was being installed. The Vert carpet has all the signs around the edge were it was cut with a carpet knife while the coupe carpet has straight edges from the machine that produced it. Vert Coupe I lined them up as best could be using the drivers side pad and a straight edge. Aside from the larger hole for the center console I could not find a difference accept around the edges where it had been cut. The Coupe carpet has nice smooth edges while the Vert carpet is fraying in the places a knife cut it.1 point -
Bluetooth Module DIY
SuperBuick reacted to Black92GS for a topic
You're wanting to do this for the STE, right? If I remember correctly, all of the early 1st gen Ws used what is essentially the same radio module. The main difference being that some used a separate display and tape/CD deck (Regal and earlier GP), where as others had everything packaged in the form of a 1.5 DIN HU, with the radio module still being a separate, removable item. When I had my 92 cutlass, I had replaced a non-functional tape deck with one from an 88 Regal with the 5 band EQ, as it was the exact same part....just contained in a vastly different package. My Regal FSM has a section that identifies the various connecter pin outs, and also seems to imply that there is 5 volt signal used to switch between Radio and "Aux" inputs. I'll post up some of the information, as it may help in your case.1 point -
convertible carpeting
94 olds vert reacted to rich_e777 for a topic
I know, I know this is taking forever. Much work remains before we are ready to announce the success in the team's ability to not accomplish anything. I didnt see a question about reinforcements but they are indeed there, the VIN number is on the drivers side. They jut in a bit on both sides at the rocker panels so the coupe carpet would be a bit wide in this section. I`m confident it would work, I just dont have the extra $400 for the mass backed carpet I want in this bear market! I`m working on getting a donor coupe carpet in the Vert now and seeing how much and wear it needs to be trimmed. If I cannot update this week then this weekend.1 point -
convertible carpeting
rich_e777 reacted to Ric for a topic
Hi, I'm hoping for a final answer also. Please reply when you have chance. Thanks1 point -
Bluetooth Module DIY
SuperBuick reacted to Black92GS for a topic
Does the tape deck still work? If so, might be worth using a Bluetooth cassette adapter. I use one in the Regal and it works pretty damn good. I did need to shim the tape head in the adapter for it to work well though. The one I have has a small wire/dongle that sticks out with a button to turn it on and off, pause and skip tracks, and it also contains the mic for hands free calling. For around $20, it might be a good alternative for a fair weather vehicle. I did consider modding mine, but I haven’t decided to pull the trigger yet, specifically because I don’t drive the car daily….and when I do, I don’t always have going anyways. Here is a small sample of how it sounds. There is some “tape print through” in the actual track that came through very clearly in the video, which kind of shocked me that my phone picked it up….but it also helps show how well the thing actually works. IMG_0575.mov1 point -
Grand Prix GTP
jiggity76 reacted to Blink for a topic
Hi, I’m trying to find a 91 to 93 Grand Prix GTP in decent shape in either red or blue. any help would be greatly appreciated. thanks1 point -

Is this normal for a 500 mile engin
89-W-Body-Regal reacted to Schurkey for a topic
You're being paranoid. Random and light brake cleaner overspray is relatively harmless. Nope. MAYBE you washed the oil off of 'em.1 point -
Mono spring delete or suggestions
pwmin reacted to 55trucker for a topic
You can look thru this old posting from 2007, there still may be some useful links in there...... the last member I can remember who did coilovers was Imp558, that was near 8 years ago.... or this one....1 point -
Bluetooth Module DIY
SuperBuick reacted to jiggity76 for a topic
Ok, I'll give him a shout.1 point -

Bluetooth Module DIY
jiggity76 reacted to SuperBuick for a topic
I did - and loved it - but no detail on "which wires to solder".1 point -
Mono spring delete or suggestions
94 olds vert reacted to White93z34 for a topic
There's a shop in Canada that either still does them or did them. Probably worth a call. https://cvmbirch.ca/ Birchmount springs, I want to say back in the day they sold a bunch of them to various members. Other then that its probably used as the only other option.1 point -
Is this normal for a 500 mile engin
89-W-Body-Regal reacted to White93z34 for a topic
Looks great to me. Spent awhile trying to see what you were talking about. that tiny bit of surface rust I cannot imagine will hurt anything. just an aside. The high res pictures really show how crudely the rocker arms were made. the top edge is really something you can see how they just cleaved the steel when they were stamping them. at least they got the surface finish right where it matters.1 point -
Bluetooth Module DIY
SuperBuick reacted to jiggity76 for a topic
Have you seen his video? He doesn't go in depth on it, (MemphisMan), but he does explain a little bit about it. I would reach out to him for the details...or I'd be happy to ask on your behalf.1 point -

Wiring diagram explain please
01 monte fan reacted to GnatGoSplat for a topic
Do your heated seats work? Looks like heated seat relays are powered by the same wire from the BCM. I couldn't find how the wire is routed, just a view of the BCM. I did come across an interesting passage in the Rear Window Defogger Description text: "If battery voltage is low, the BCM will disable the rear window defogger by removing the battery positive voltage supplied to the REAR DEFOG relay coil." How's your battery voltage?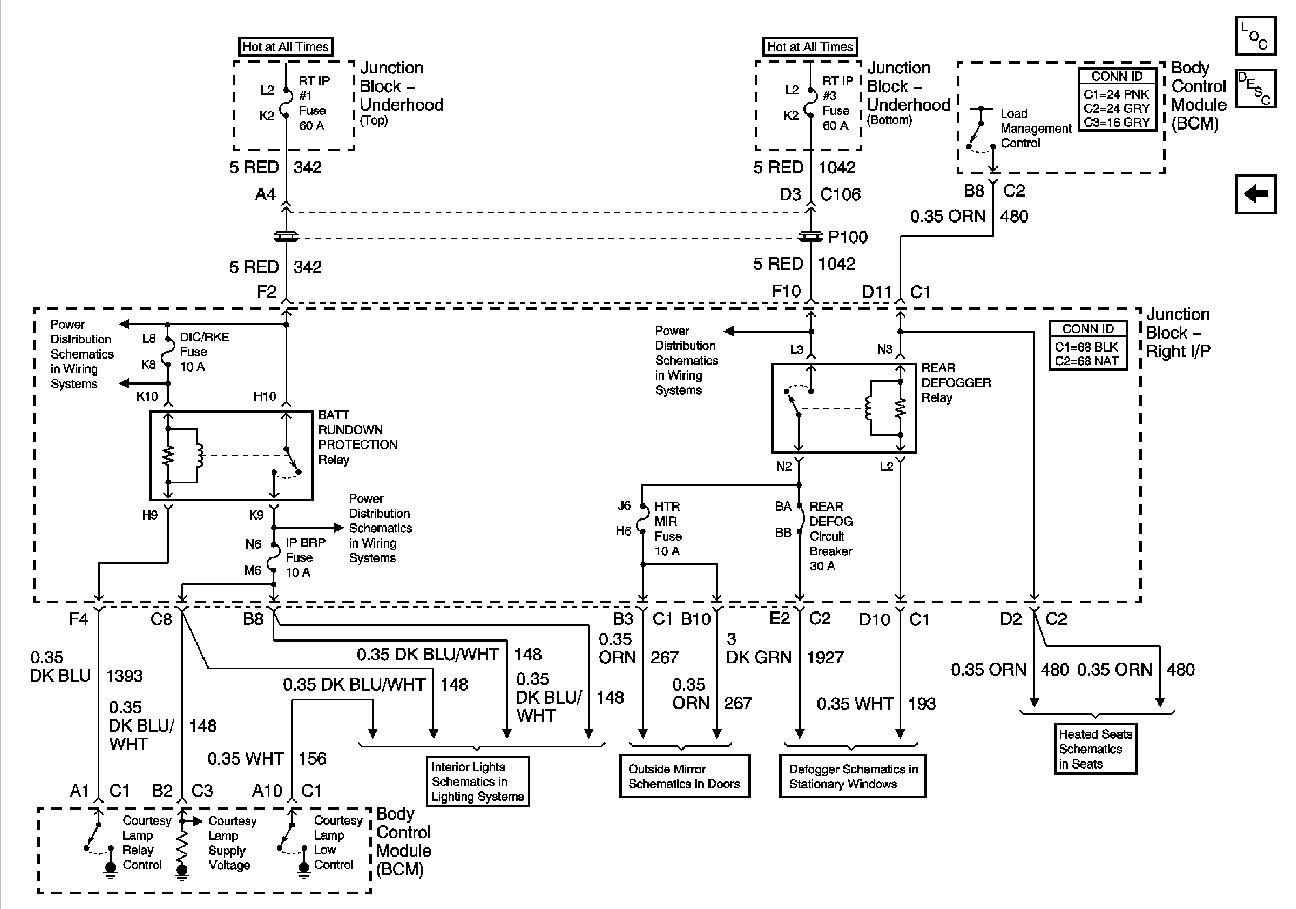
 1 point
 -

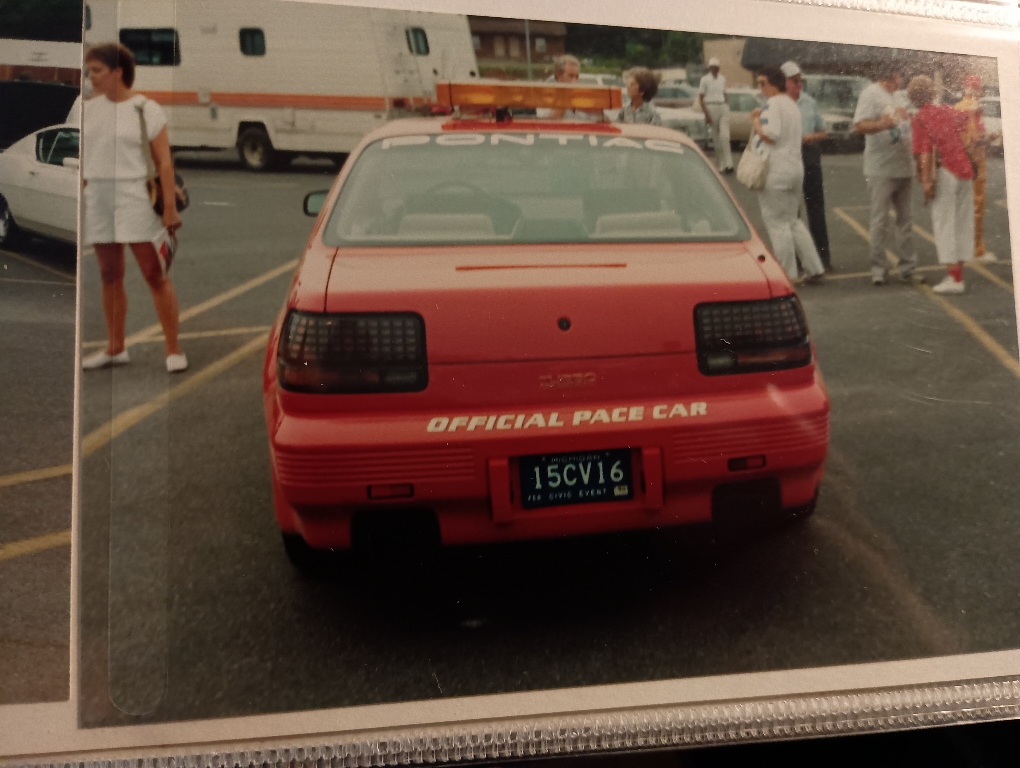
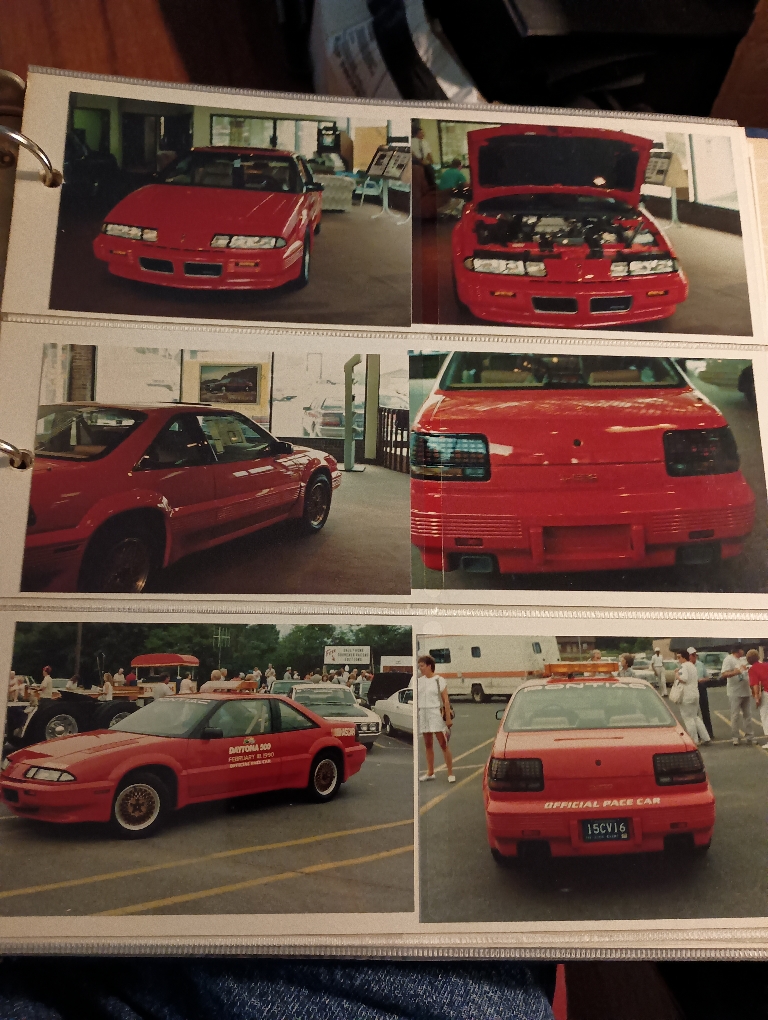
Vintage W-body photo thread
89-W-Body-Regal reacted to ManicMechanic for a topic
Found on a Pontiac forum.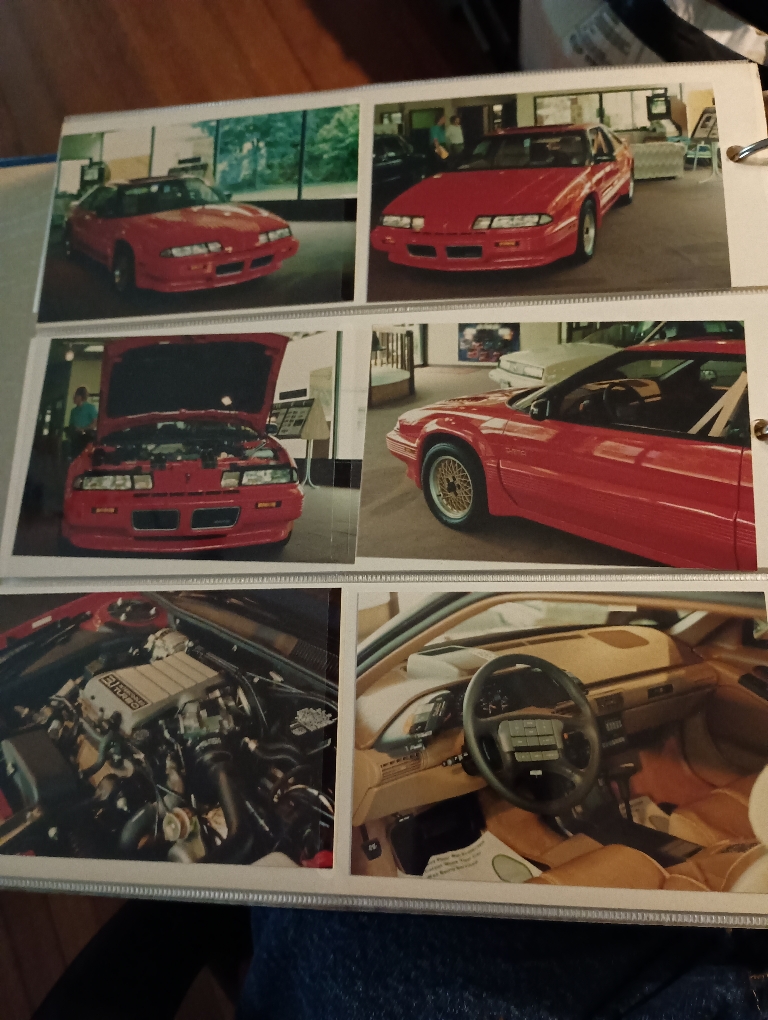
 1 point
 -
convertible carpeting
94 olds vert reacted to rich_e777 for a topic
Ha! I knew there was something I was forgetting. Yes in fact there is indeed an update... Ive not seen any differences in the carpets other than the rear area I posted earlier about. Ive got the convertible carpet removed completely and have been deep cleaning. I dont see any structural differences in the floor pan layout between the coupe and convertible until you get to just behind the rear seats. Life events are holding me up ordering the carpets right now. But when I do I personally will be ordering two identical slate grey carpets from RockAuto for a 1994 Cutlass Supreme and trimming one to fit my 1995 convertible.1 point -
convertible carpeting
rich_e777 reacted to cjc for a topic
Very Curious as to how this turns out, If the only difference is in fact the rear floor reinforcement at the rear seat then that should be a win! Curious as to what else you find in the front.1 point -
`89 TGP joining the collection
Psych0matt reacted to 55trucker for a topic
^ Yeah, Matt used to take the *cut & weld* approach, I couldn't understand why he did them that way seeing as he is/was a machinist at the Toyota plant in Woodstock here in Ontario & had access to the needed tools. I prefer to cut the ends & rethread them..jpg.c63422ecd35a5da51c7b88afb523e4c3.jpg) 1 point
1 point -
92 4 door lumina transmission problem any help
90sEraWhips reacted to rich_e777 for a topic
I can back this up as well, Trans-X will make the flattened internal seals swell up again for awhile. I`ve used this and Lucas stop leak to keep my delayed engagement issue at bay until my other car is road read. Don't over fill it, if it doesn't damage the trans inside it might pop your cooler lines while driving and the subsequent loss of fluid all over the road will surely cause some issues.1 point -

92 4 door lumina transmission problem any help
90sEraWhips reacted to Go4DaMo for a topic
I can vouch for this! Did you resolve the problem?1 point -

92 4 door lumina transmission problem any help
90sEraWhips reacted to Hairdo12 for a topic
I have posted this reply to similar threads asking about this about a dozen times. The valve body has an internal leak. I have seen this many times where you decelerate and the transmission is basically in neutral until you rev, build up some pressure and it slams into gear. Only happens when using OD and does not do it in 3. A bottle of TransX can "fix" the problem. It works every time and takes about 15-20 miles of driving to fully stop this. My old 92 lumina started doing this 12 years ago. A bottle of TranX every three years when the problem returns and it's still going and no rebuild was required. I don't own the lumina any more but know it's still running with go4damo and he is aware and has used the TransX to solve the problem himself I beleive. I have recommended the TransX to bunch of people locally and it has worked on every car. Only mechanic in a bottle that I actually am amazed with.1 point -
3.4 DOHC baffled
Schurkey reacted to Galaxie500XL for a topic
I suspect the reason there are so few mods for the LQ1 is there were very few LQ1's actually produced, relative to other engines GM used in the same car lines at the time. IIRC, the LQ1 was a $1700.00 option on my '95...which would be awfully close to 10% of the base price for the entire vehicle...not exactly a winning strategy to encourage widespread use.1 point