Leaderboard


Popular Content
Showing content with the highest reputation since 04/22/2024 in all areas
-
Cutlass Supreme early development pics.
tornado_735 and 8 others reacted to jiggity76 for a topic
A friend of mine bought this off of Ebay and wanted to share it with everyone. Pretty cool historical information of the car's development.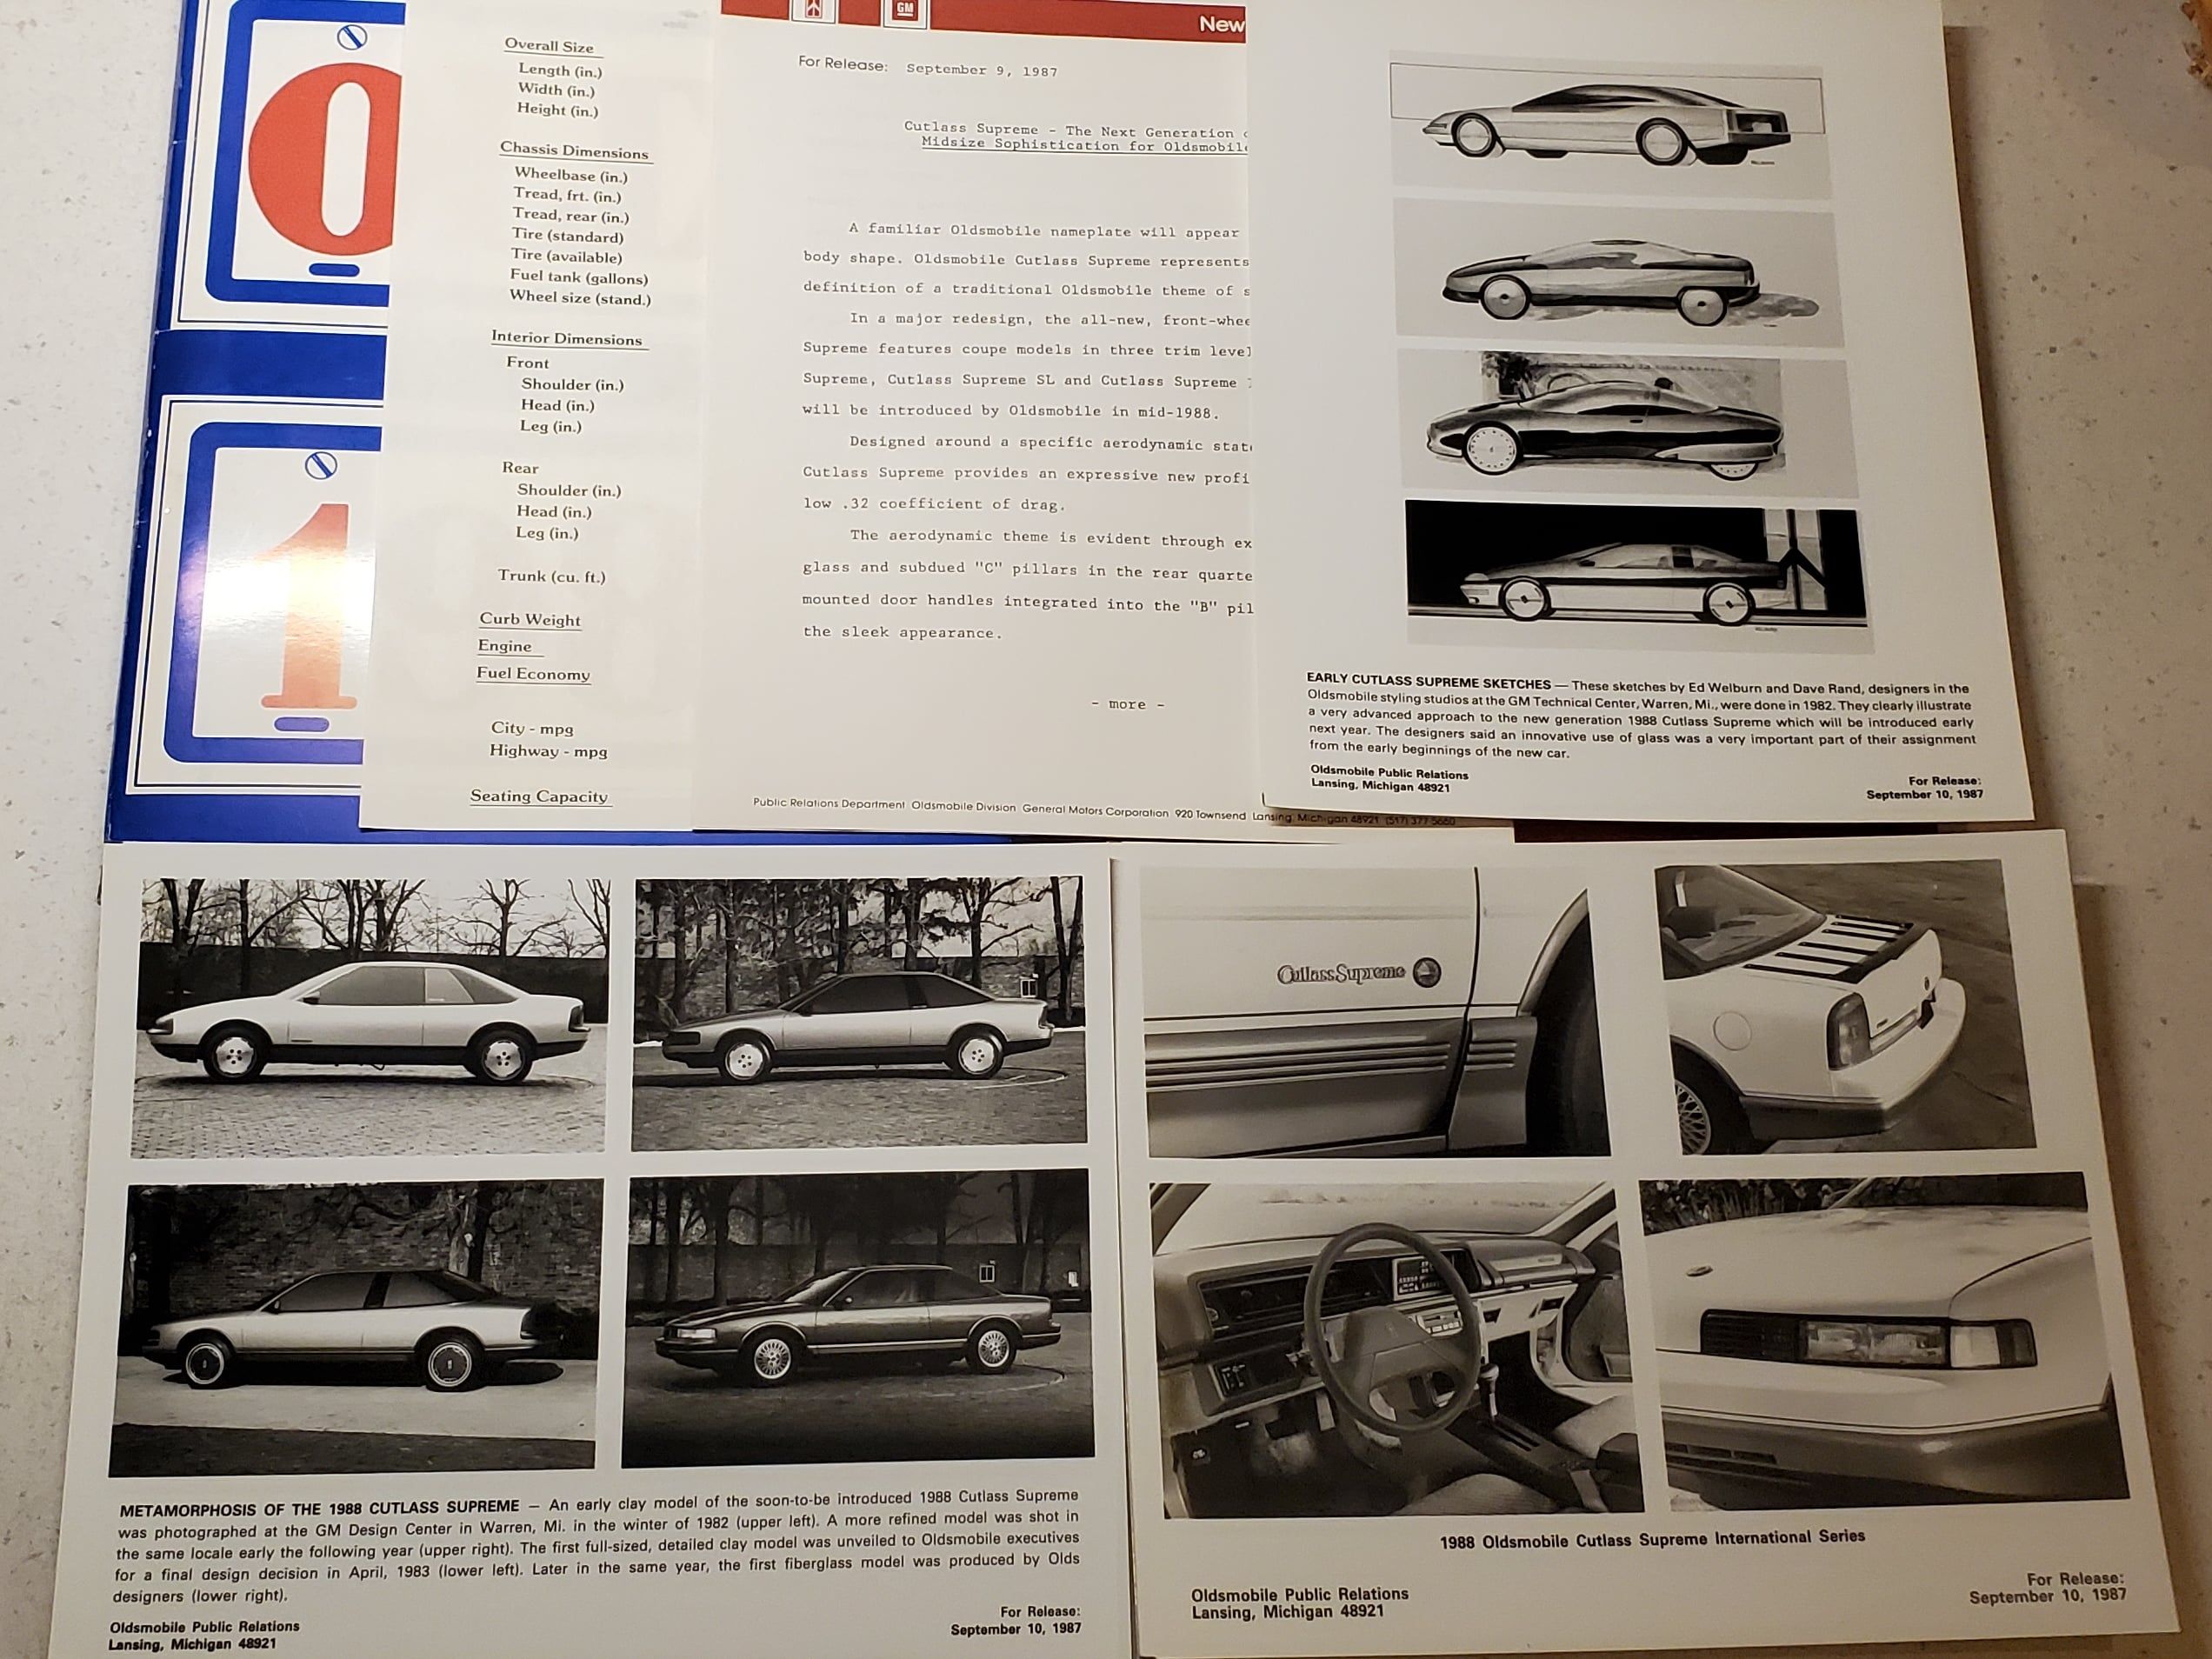 9 points
 -

Performance Brakes on a 1st Gen
rich_e777 and 5 others reacted to Megavolt-380 for a topic
My version of the front brakes looks like this Disc 300mm Opel Astra-J GM 13502051 Caliper 2-piston 45mm Opel Antara / Chevrolet Equinox GM 96625936 - left GM 96625937 - right my version is on the left 1,5gen - on the right Use stock 16inch Wheel The mileage on this version is about 30,000 miles System without abs, stock master cylinder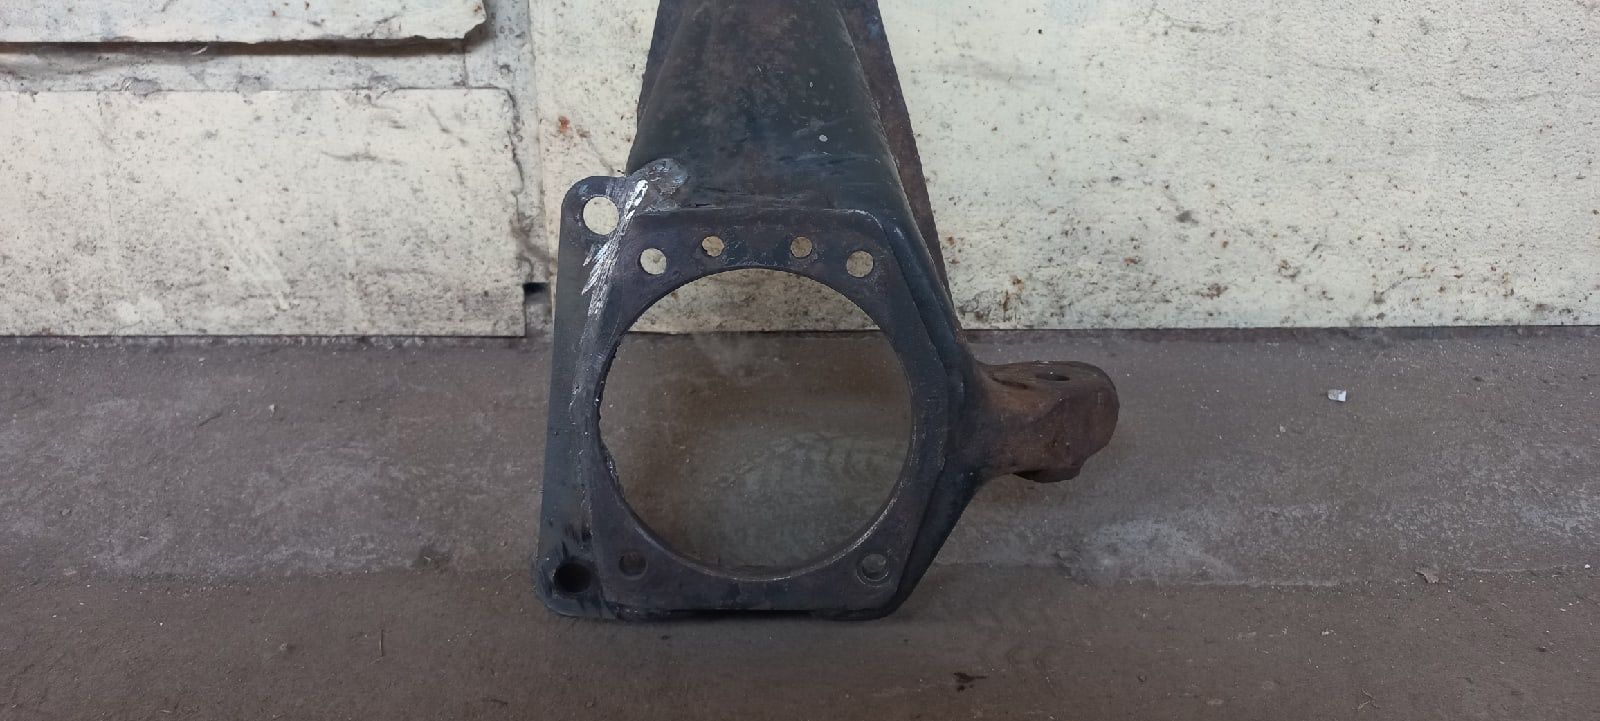
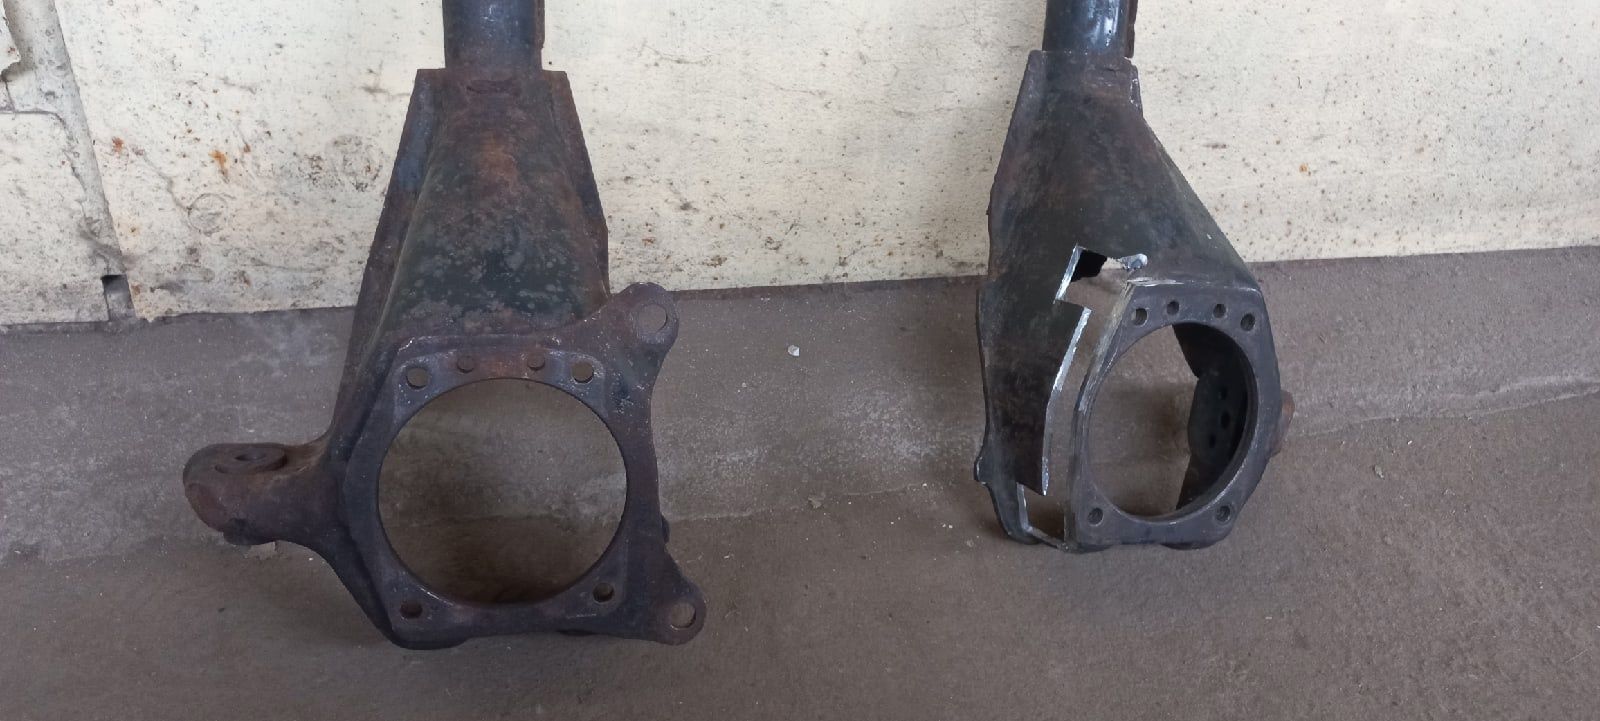
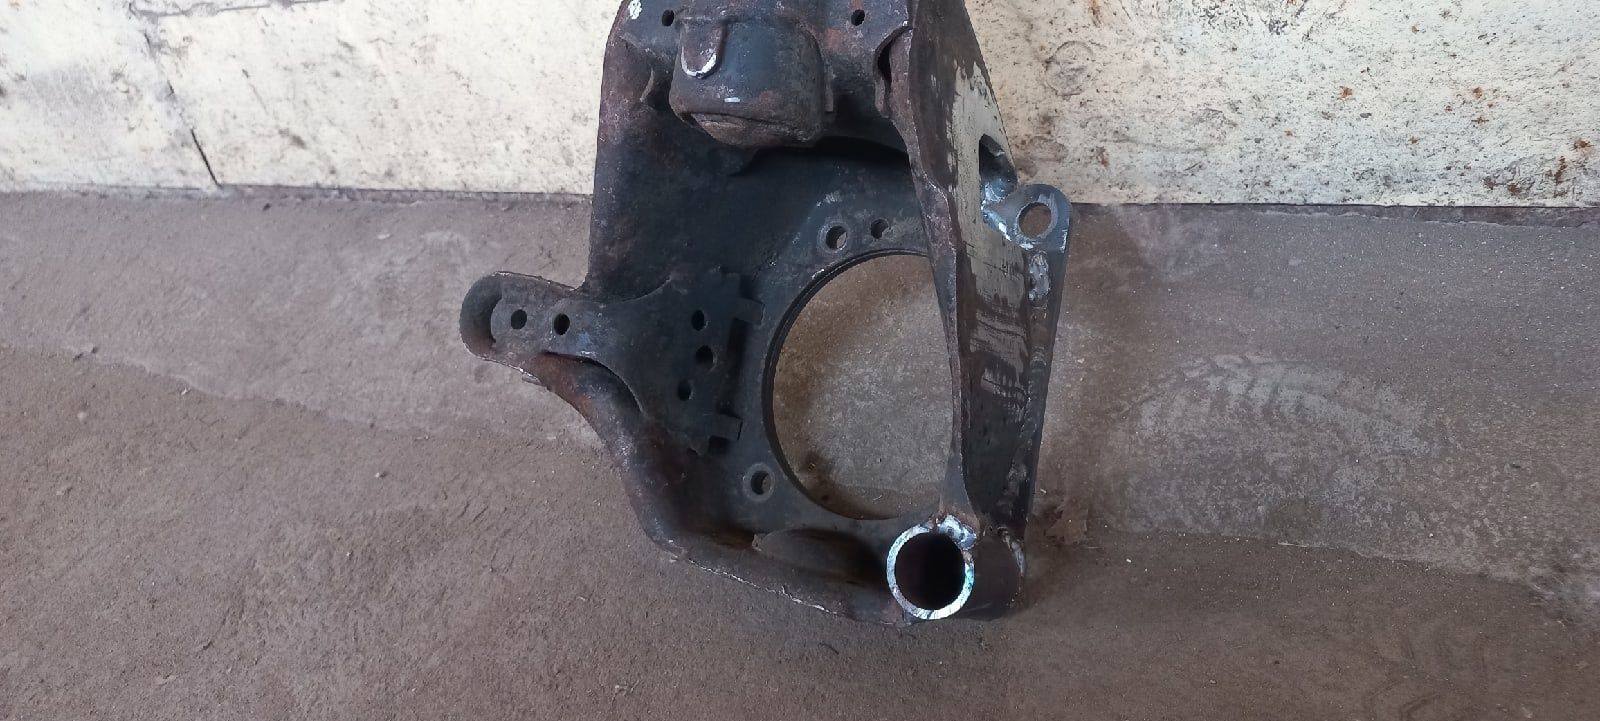
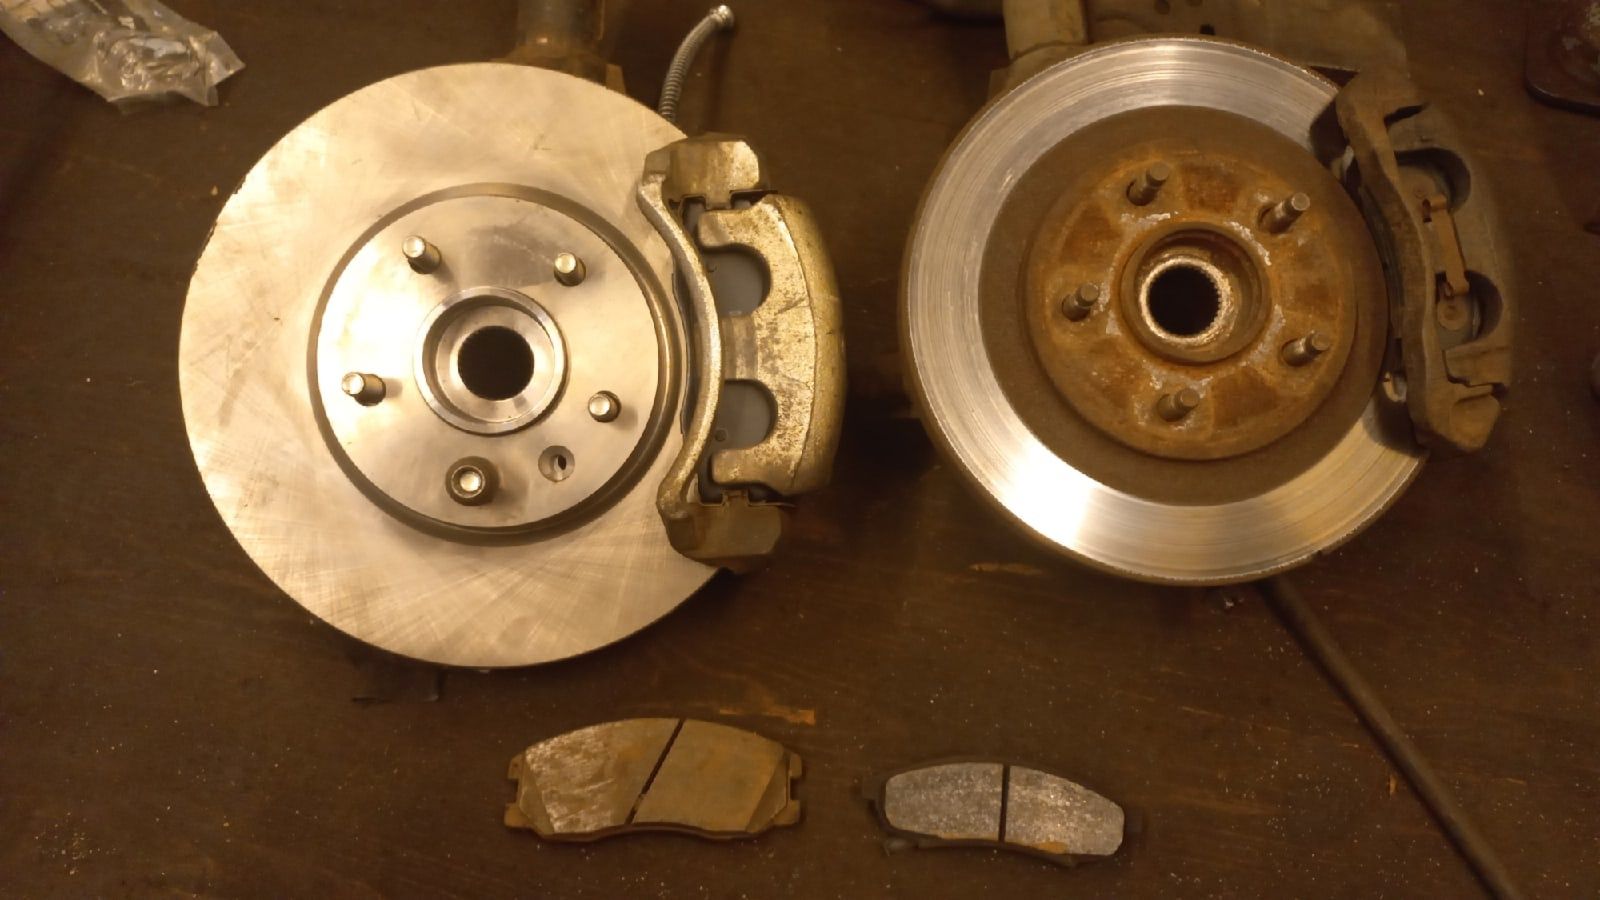
 6 points
 -

Cutlass Supreme early development pics.
jiggity76 and 4 others reacted to bluecalais79 for a topic
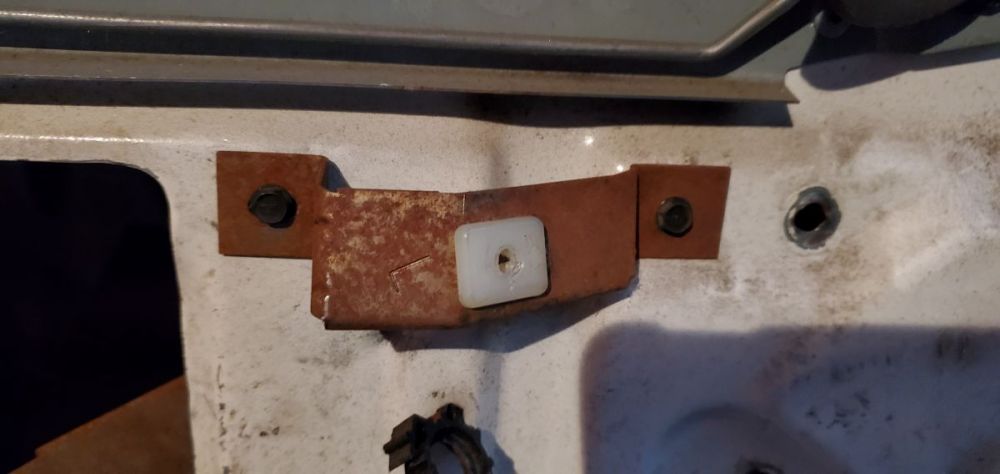
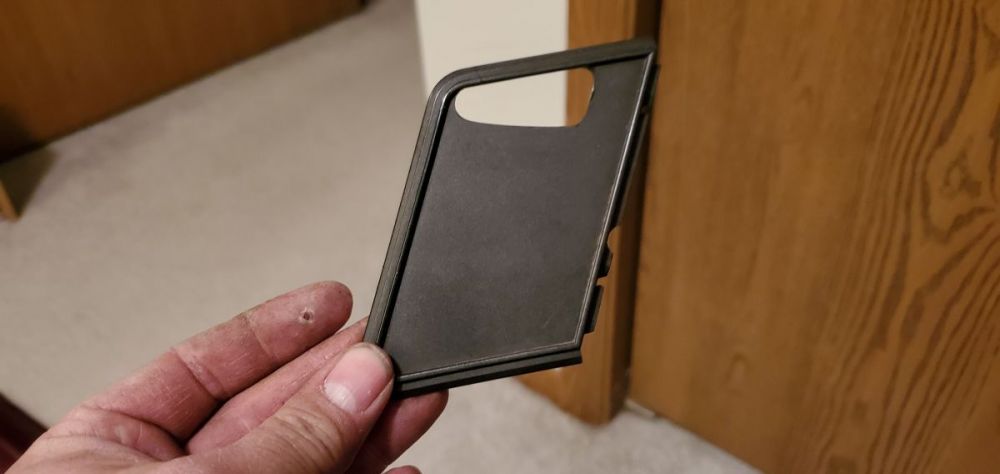
x2 on that, but, IMHO I wish they could have made the 2 doors with door handles in the door and not in the B-Pillar. These handles are nothing but headaches. And, the Verts would not have needed a basket handle (?) I'm needing to replace my LH Door handle. Again. 5 points
 -
3.8 Series 1 5-Speed regal
GnatGoSplat and 4 others reacted to White93z34 for a topic
For once I condone a thread being resurrected 22 years after the fact.5 points -

3.8 Series 1 5-Speed regal
GnatGoSplat and 4 others reacted to SuperBuick for a topic
It took me 22 years but I finally did do that manual swap5 points -
New (returning former) member with a new to me 1st gen survivor
SuperBuick and 4 others reacted to Black92GS for a topic
Like the title says, I am a new member now, but I was a fairly regular member here around 15-20 years ago. My screen name at that time was Regal_GS_1989. I originally owned an 89 Regal GS coupe, a 92 Cutlass International Coupe, and finally a 2000 Regal Sedan. Life got busy, I stopped posting regularly, and the 2000 was sold off about 10 years ago for something newer and more family friendly. Time has marched on, and I am now in a position where I have the time and resources to be able to own a “weekend” vehicle. As luck, or possibly fate would have it, this beauty quite literally fell into my lap at the perfect moment… A 92 Regal GS Coupe. Black, Grey leather interior, low milage, One owner, garage kept its entire life, ordered new with every option box checked off…save for the sunroof. It’s truly worthy of the term survivor, and it’s exactly how I would have ordered one myself back in the day. Gotta say…it feels sort of strange to be back here posting again about a 1st gen coupe…but I can get used to that I am also surprised at how many screen names I still recognize as well!
 5 points
 -

Can't get the steering wheel controls to work with the Pac Swi-X controller
rich_e777 and 4 others reacted to Pontiac6KSTEAWD for a topic
I know I have one NOS in my my Parts Stash, and theres another member wanting to buy some parts out of that box... I just gotta find it in my garage.. Kids... Dont hoard stuff.. When you want something, you will NEVER find it!5 points -

Fast Forward Performance. FFP
Bake82 and 3 others reacted to AWeb80 for a topic
Update. the 9.6121 pads work perfectly. I sprayed them down with silicone during install and not a peep or a squeak out of anything.4 points -
doing an f40 transmission swap will update
Raffaelli and 3 others reacted to SuperS18 for a topic
I have an f40 trans from an 07 g6 GT as well as a 2006 monte carlo lz9 3900 and will be doing a swap over this winter I will update with details as it goes along4 points -

My Turbo 99 Z34 Monte Carlo
94 olds vert and 3 others reacted to HolyZ34 for a topic
It's been a while since I've logged in. I was more of a lurker back in those days... But I'm glad to see the forum is still up and operating!! Happy New Year Everyone!!


 4 points
 -
Factory exhaust fun fact
SuperBuick and 3 others reacted to 55trucker for a topic
That's OEM m'boy.....no muffler shop involved, the GT coupes that were fitted with the dual exhaust, & the STE's were fitted with that small left side muffler. It was done that way to get needed clearance under the floorpan, you notice that the left side floorpan has no heatshield in place to protect the fuel filler hose & the evap lines, but the right side does have a heatshield. That small muffler is fitted with a strap-on flimsy heat deflector that does literally nothing. If you toss the original rusted out mufflers don't toss the trumpets, keep them, those are near to the point of being unobtanium. 4 points
 -

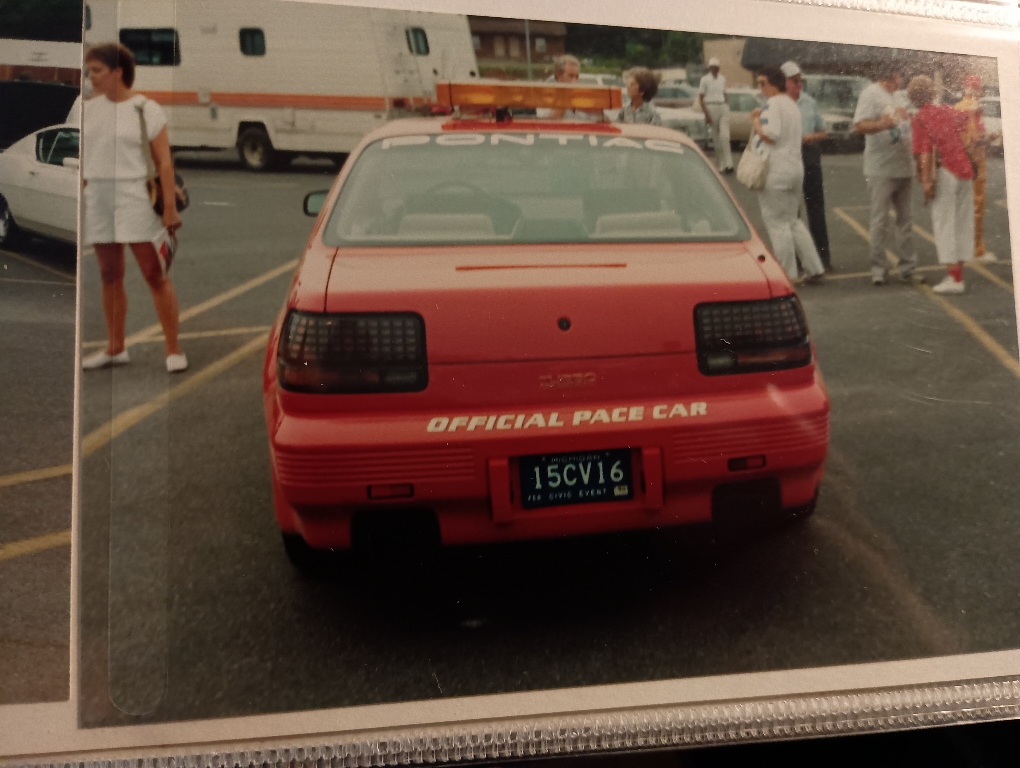
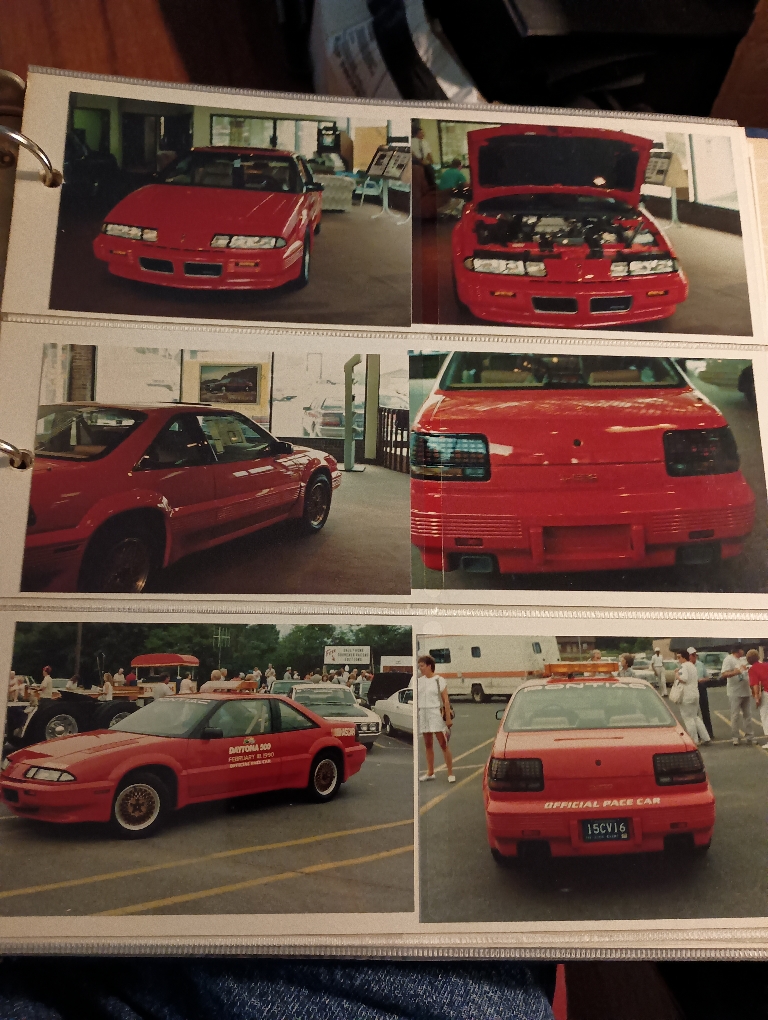
Cutlass Supreme early development pics.
primergray and 3 others reacted to Amanita for a topic
Also of note it looks like this car has the half pop up headlights that this clay model had as well, though it looks like they are taped shut possibly? Ignore the filename, definitely not from 1988.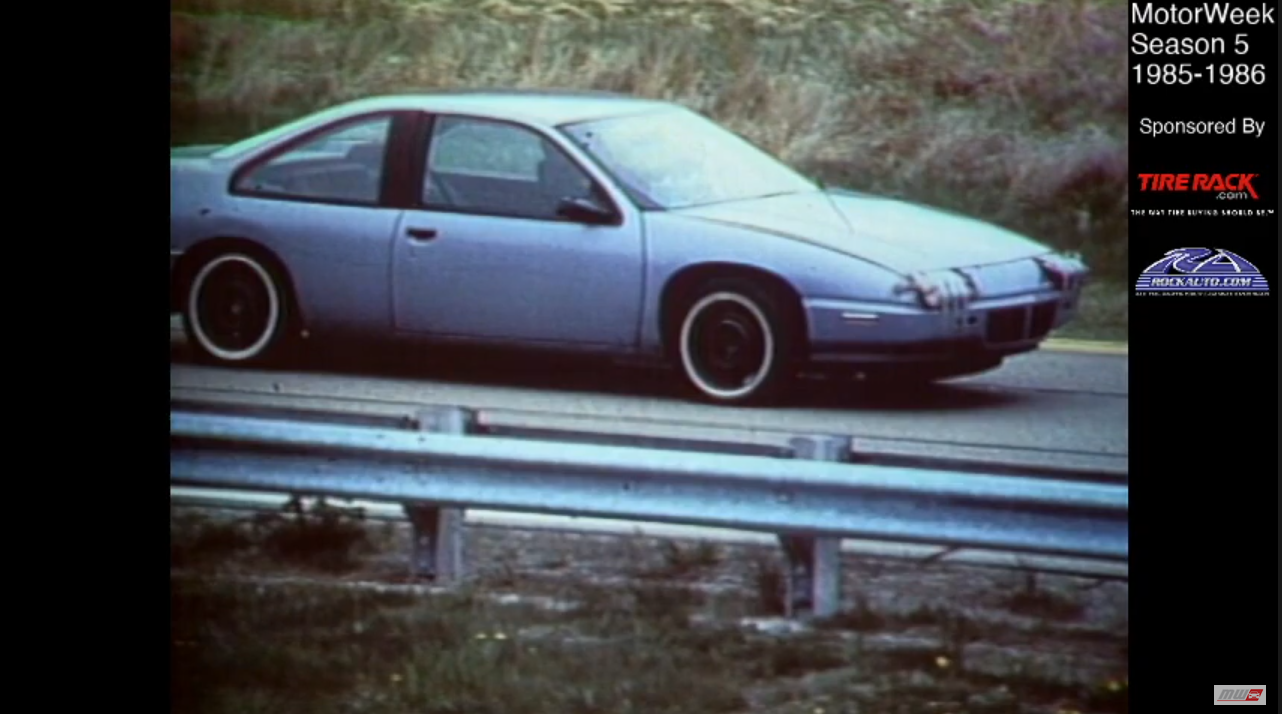
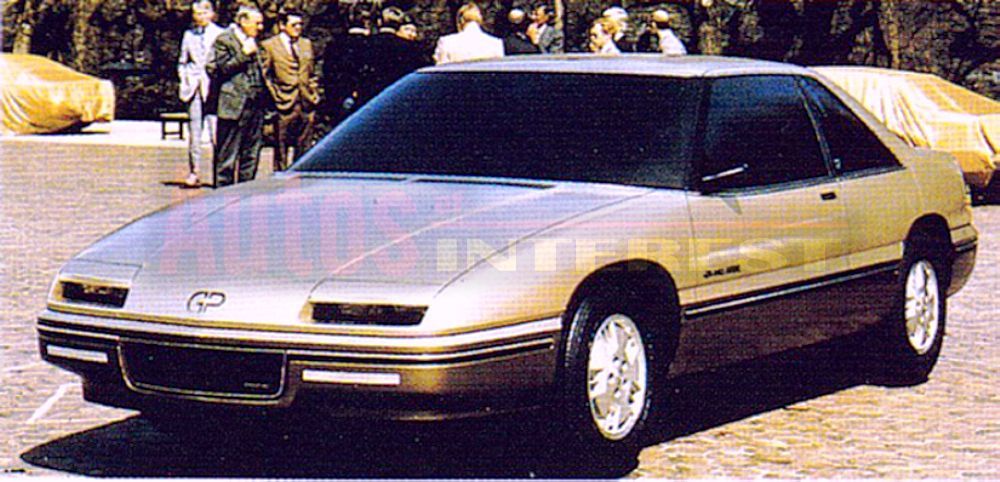 4 points
 -
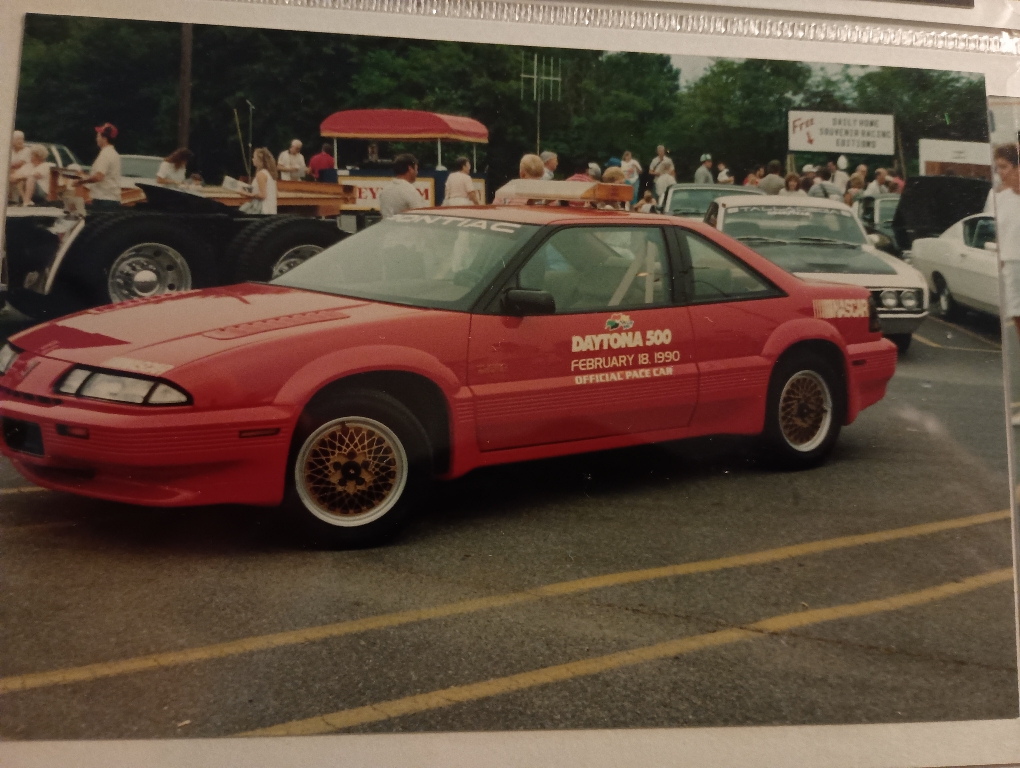
Cutlass Supreme early development pics.
rich_e777 and 3 others reacted to Amanita for a topic
The automotive news show motorweek holds marathons for their older seasons on Youtube and one of the episodes they played had this spy shot of a Grand Prix prototype that I haven't seen anywhere else. I wonder if they still have the picture in their archives.
4 points -
Sitting 1995 Regal GS
rich_e777 and 3 others reacted to architect for a topic
I posted this on Reddit and was told to come over here Someone is giving me their 1995 Regal GS that's been sitting for a few years after her husband passed. She's older so hard to know if her memory of timing is right. The battery is dead and the tires look deflated. It's only got ~100,000 miles on it. I'm planning on getting it towed straight to the mechanic, but also wondering if I can just replace the battery, put some air in the tire, and drive it home first or would that just cause more problems? I don't have indoor marking so the car will have to stay outside and endure the winter
 4 points
 -
97 cutty ls4 swap
97cutty and 3 others reacted to Donny_olds for a topic
Lowered the cutty and got her running on 15 psi of boost. Thinking of taking her up to brainard raceway in September and gettin some runs in 4 points
 -

Vintage W-body photo thread
89-W-Body-Regal and 3 others reacted to ManicMechanic for a topic
Found on a Pontiac forum.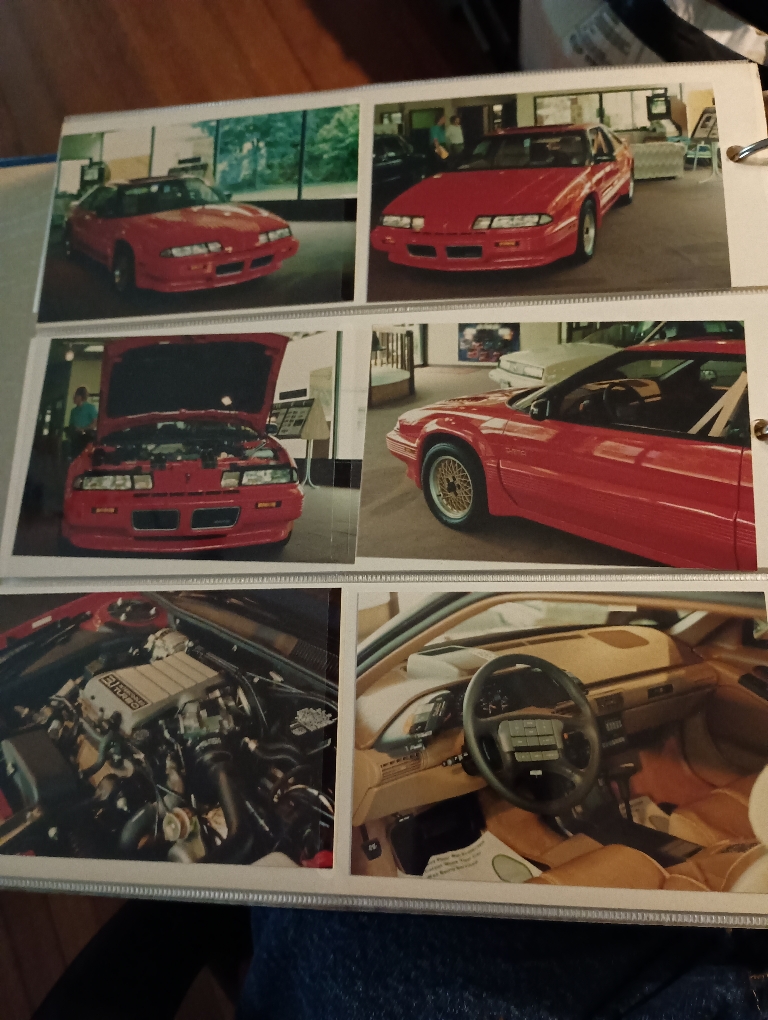
 4 points
 -
TRW Keyless Entry module
White93z34 and 2 others reacted to 55trucker for a topic
In the GP it's mounted to the topside of the right rear parcel shelf next to the speaker.3 points -
Down on power L67?
94 olds vert and 2 others reacted to rcLord510 for a topic
Ended up being a bad fuel pump as a result of a plugged return line, which also killed the fpr, thanks though everyone!3 points -
Should I go back to stock?
94 olds vert and 2 others reacted to rcLord510 for a topic
You know, the ps2 is actually more useful then you’d think, I put one in the GTP and it’s actually quite fun to mess around with while I’m waiting for someone or whatever. i agree with Chris. Leave it how it is, this car has such a huge legacy around here, hell if I had the money and you were selling it I’d so buy it, of course, IF 3 points
 -

Seventh Gen rear hub bearing issue & upgrade
SuperBuick and 2 others reacted to Last American Indian for a topic
I would offer this cautionary story if you plan to build a ground pounder as they are called! I can not speak about all FWD’s as I have not built the suspensions of all manufacturers, but of all GM & the like there is a serious issue with McPherson strut/knuckle suspension vehicles, especially when it comes to building an aggressive handling suspension. This is due to the illogical application of the wheel bearing design! In a traditional rear wheel drive the bearings are installed on a traditional spindle with two tapered roller bearings. This design can not fail, I.E. the wheel falls off! Other than to have a bearing go bad, there is little else to occur beyond stranded! As it would be virtually impossible, due to bearing failure, for the wheel to come off! That is not the case with a FWD! The rear hub bearings are held in place by bolts that thread into the knuckle. Which pushes the wheel hub into the knuckle. The wheel obviously bolts to the hub. If the hub bolts that are threaded into the knuckle fail for any reason, the hub has nothing to keep it in the knuckle, or the wheel on the car! This was such the case for me! Fortunately I caught my problem before it became a dilemma or catastrophe. When I built this suspension many years ago I built everything new from the ground up, including hub bearings. They were done more than correctly! The fit to the knuckle was a little tighter than factory & the torque was 5 pounds more. And yes it has taken nearly 20 years to raise its head, but that’s only about 15,000 miles. So it went like this. For the last half of last summer & most of this past summer every time I would make a hard, I.E. aggressive right turn I would get this rattling noise from the left rear that kind of sounded like decelerating exhaust while in the cornering sequence. Straight forward driving it seemed quiet. Over & over again I would check & recheck, exhaust, brakes, tire rub, suspension clearance, suspension component torque, etc., but nothing! It drove me nuts, because I knew something was wrong. I took out the back seat pulled the access plate to the fuel pump. Now it appeared more metallic then. Took it on the freeway & now I would hear a intermittent hard metallic crack. That was it, I knew I needed to put it up in the air & go through the whole back suspension piece by piece, oh great! Well I didn’t have to go far. Removed left wheel, caliper, rotor & bingo! There it was! Looking through the access holes of the bearing hub tire mounting flange was a hub mounting bolt. Loose & bent. I replaced it & checked the torque on the other 3 bolts. All were loose! I check the other side. One needed re-torque slightly, the rest were good. My take on this is this. The hub bearing mounting setup is poor at best, but the front is better than the back. The front use 3 larger bolts mounted from the back. This is better because in hard cornering, the loaded wheel, this places the bolts in compression & the bearing receives more of a angular vertical load. So while this is far less than optimal, it’s by far better than the back. On the other hand the back is abysmal! In a hard corner the rear load wheel has a similar load as the front, but the bolts are a third of the diameter & they’re being stretched & the following wheel is also being stretched because they hold the bearing hub from the front. I have a new design for these that I am building this winter. I will share it with you folks so if you chose you’ll be able to incorporate it as well. This design will be more in the vain the a spindle type attachment that will have a means to be a fail safe design that would prevent this type of bolt failure. This post is to make anyone who wished to do any of the aggressive modifications I’ve done aware of the possibility. I wouldn’t think you would see this type of issue in a non modified vehicle. I have no doubt that the aggressive nature of the Indian’s suspension is the reason for the occurrence. When you’ve increased the track width by a foot, stiffened the suspension components so they transfer power effectively to the ground were it belongs & you actually use it in the manner you built it for; it’s not surprising! What is surprising is that any head engineer would let such a flawed design make it to production! Let alone prevail for decades & hundreds of thousands of vehicles. The simplest of design change would have kept the possibly of the catastrophic failure like the wheel coming off, should have been the mind set no matter how unlikely. I will follow up with this shortly.3 points -
Cutlass Supreme early development pics.
jiggity76 and 2 others reacted to Amanita for a topic
When I win the Mega Millions I'm going to produce replacement door handles that don't break. If you would like to support me in this endeavor of spending tons of money on lottery tickets please write me a check.3 points -
Any other Supers here?
GnatGoSplat and 2 others reacted to RT Jam for a topic
2008 Buick Allure Super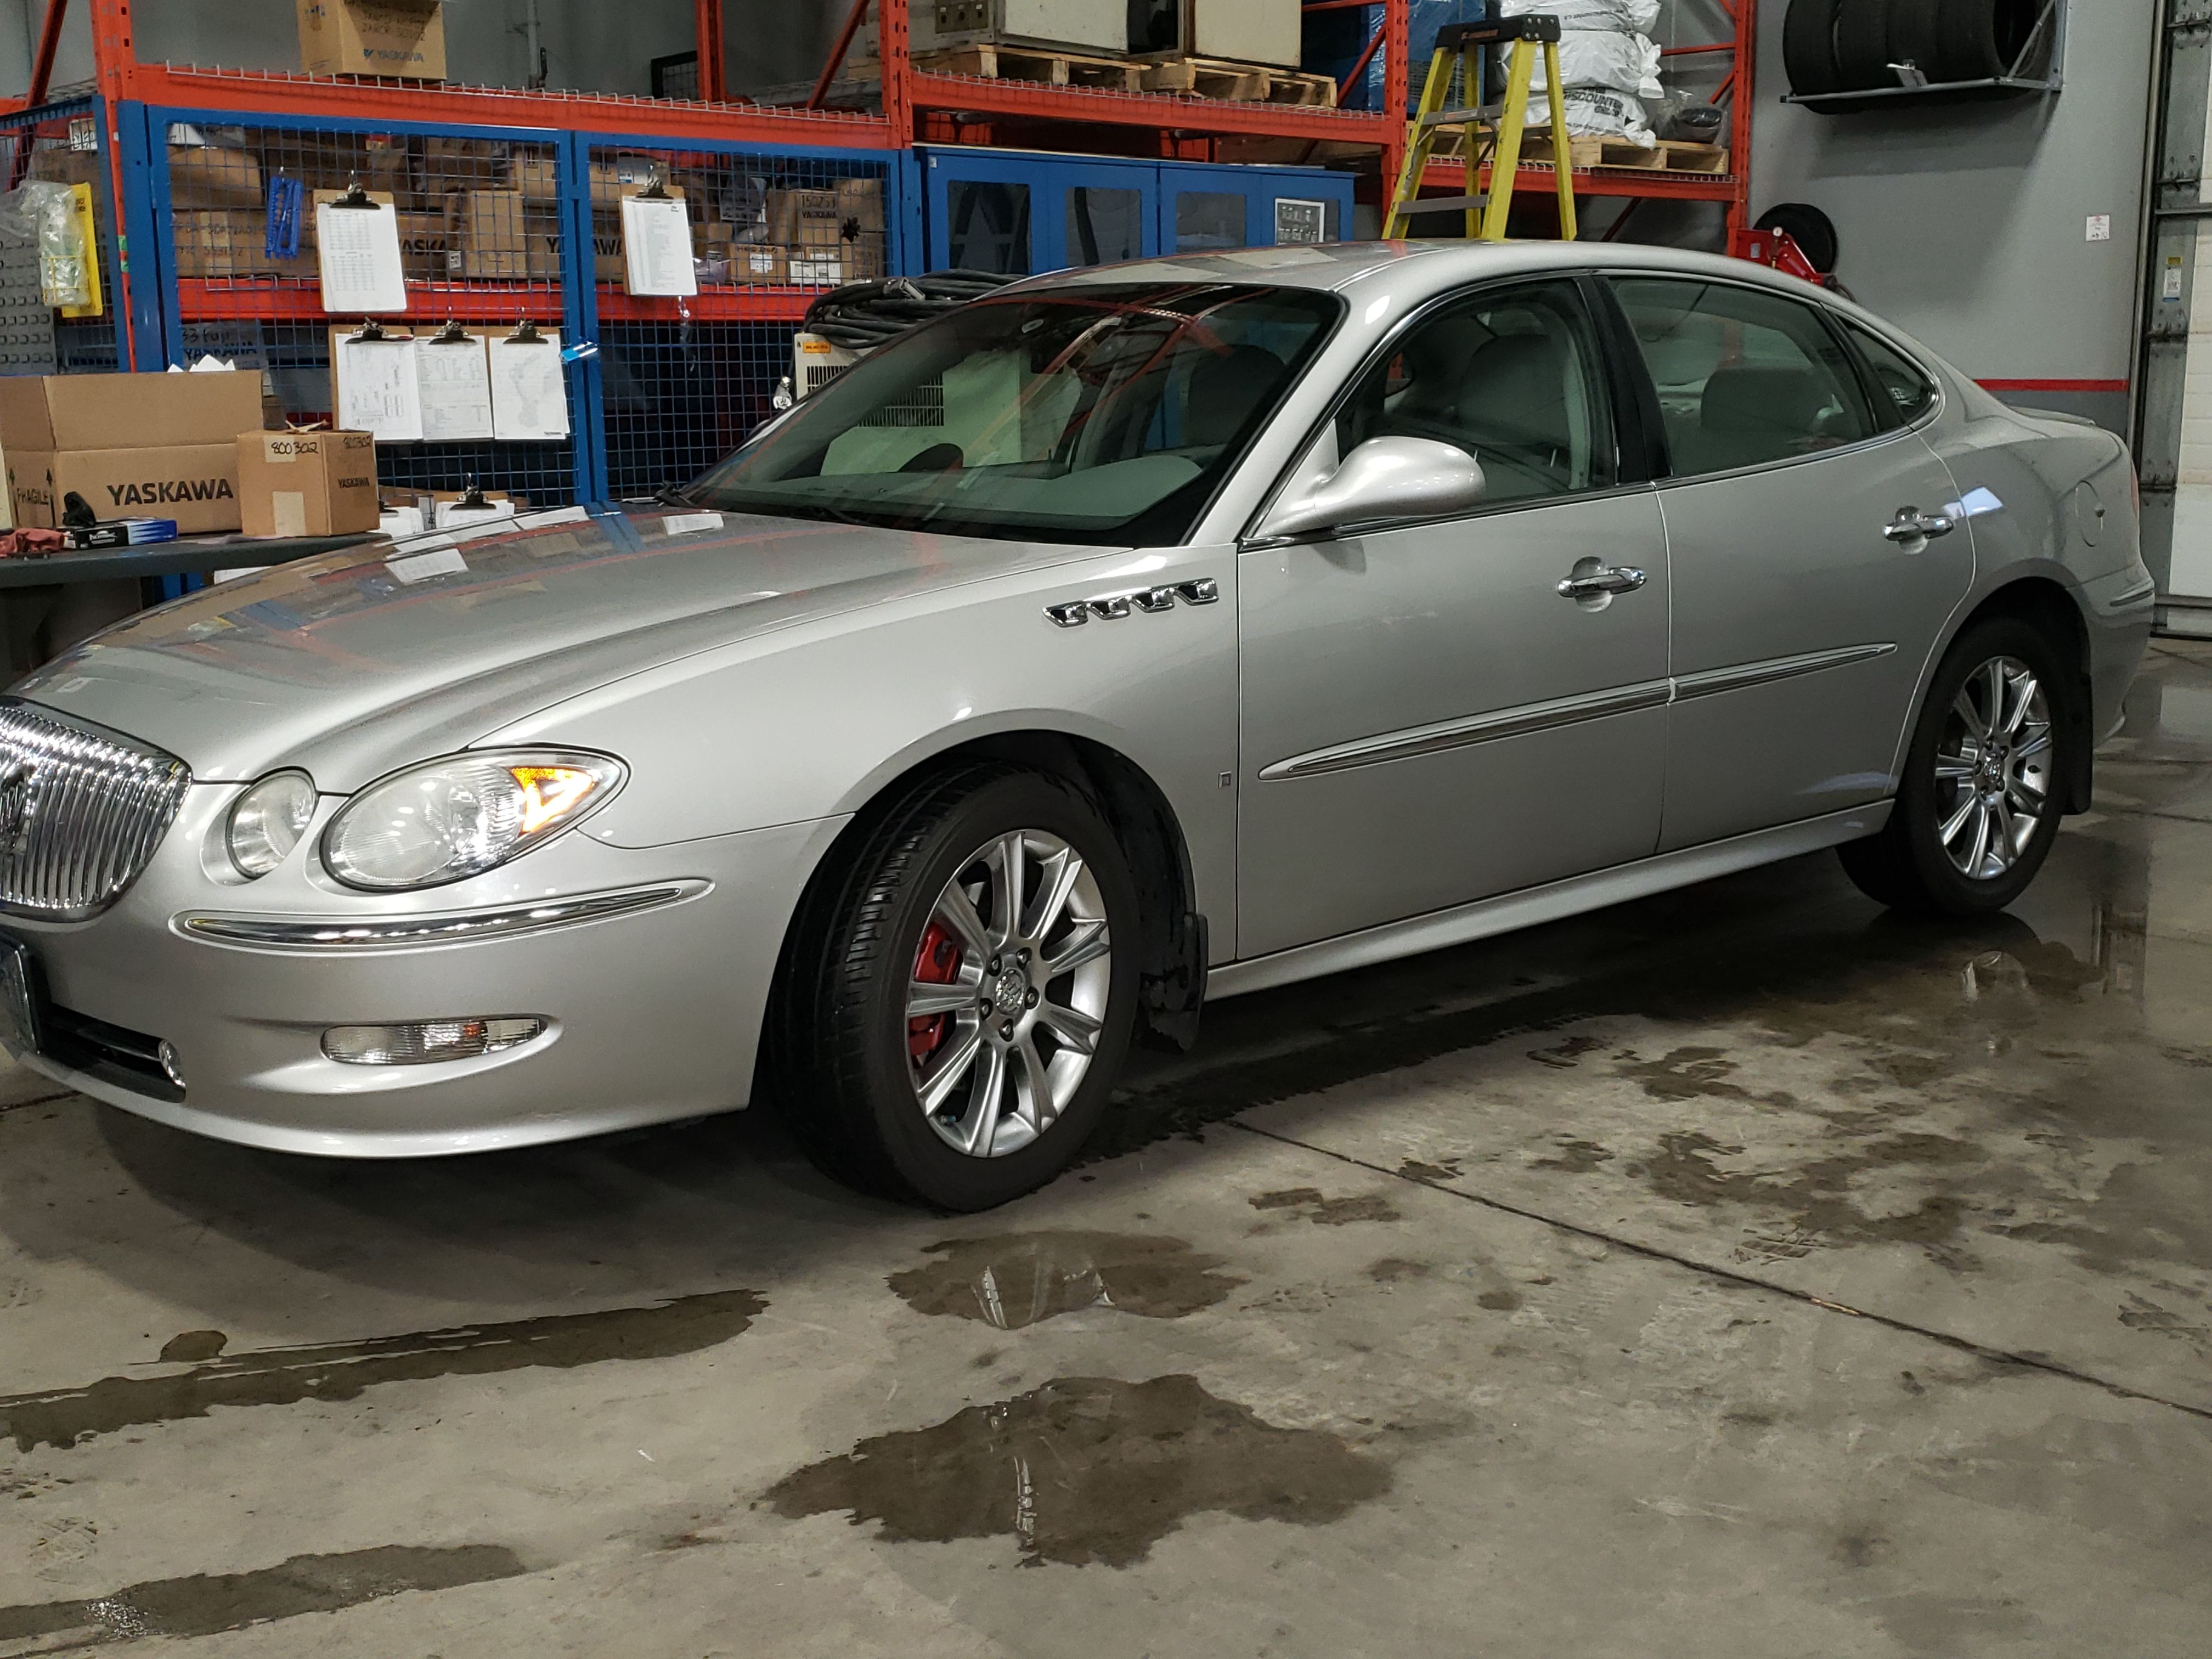 3 points
 -

Getrag 284 Serviceability
SuperBuick and 2 others reacted to runt for a topic
https://web.archive.org/web/20161019020737/http://www.rodneydickman.com/n36.html I did find that.3 points -
BraveTECH interest in 88-96 Grand Prix Taillight kit.
rich_e777 and 2 others reacted to Amanita for a topic
Same, I'd rather put that money down for brand new OEM style tailights.3 points -
I still lurk :-)
Addicted to eaton and 2 others reacted to runt for a topic
I thought this was the W-Body old folks home...3 points -
1995 Cutlass Vert - Assistance Identifying and locating part
rich_e777 and 2 others reacted to JGP for a topic
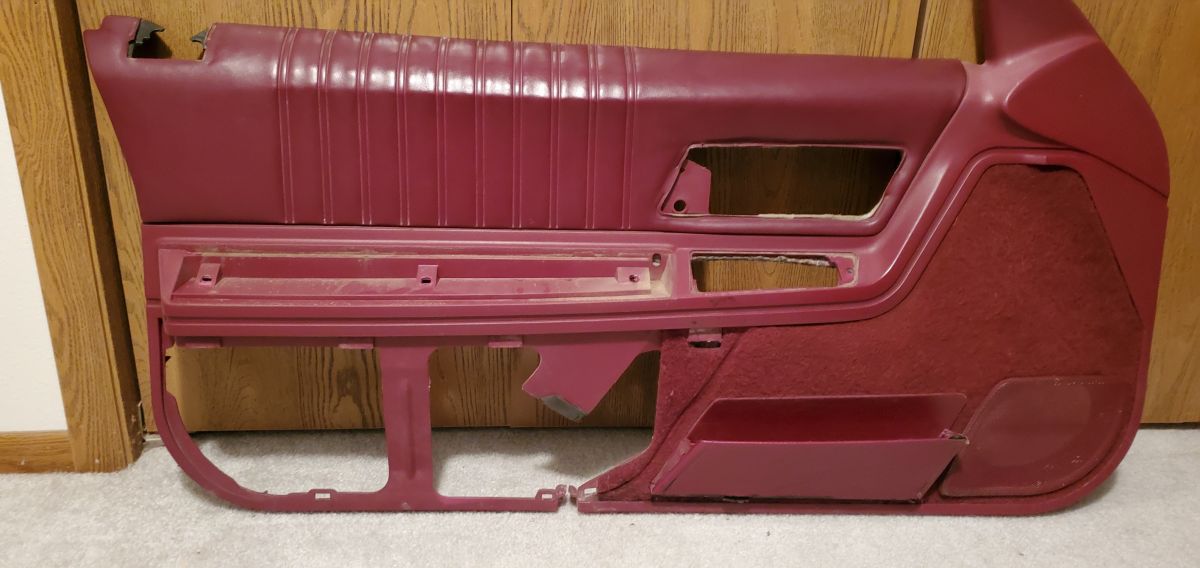
Update, I ended up finding a drivers window with the part attached. The only way to get my hands on it was to offer some serious coin to a gent that was trying to sell his 95 without any luck. He ended up pulling the drivers rear window for me also; if anyone is in need. If I plan to keep my Olds, I'll probably just take his whole car for parts as he only wanted 1k for it. At the time, I didn't bother as it was over 800km's away and I didn't want to invest in the tow. FYI, it's a heck of a little job to get the glass out without damaging anything. There are a few parts that (when disassembling) are very likely to be damaged if you don't know the exact process. Even following what little info is in the Service Manuals, the interior door panel is vulnerable to breaking the little molded housings that secure the plastic plugs in place...3 points -
1994 Cutlass Supreme- 2rd, Front speakers
rich_e777 and 2 others reacted to jiggity76 for a topic
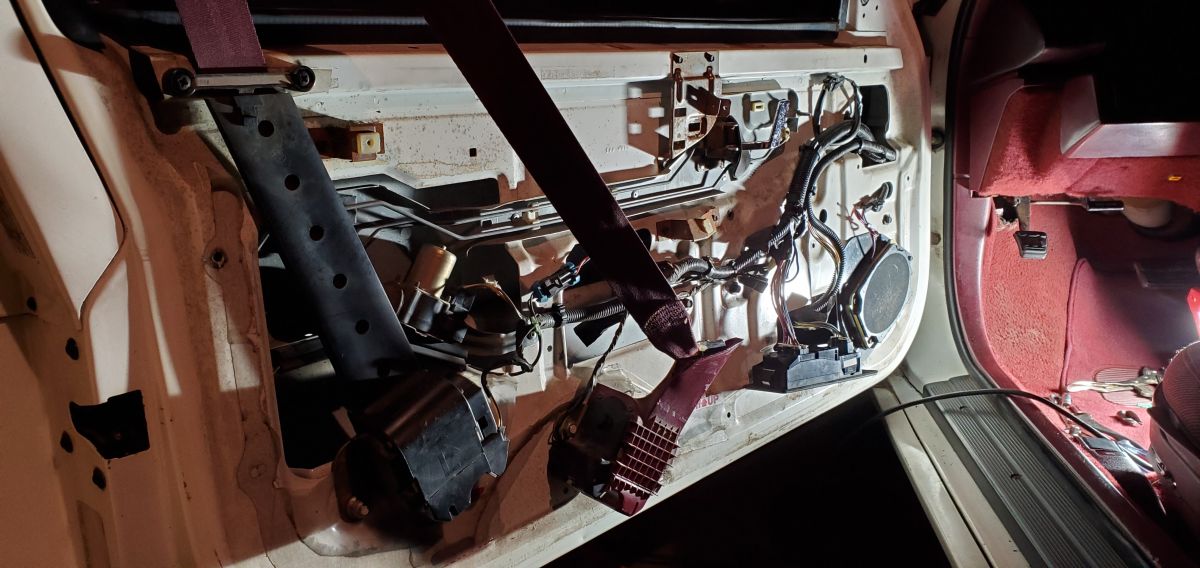
Yup...going by memory here and basing it off of my 91 Cutlass coupe. Step one - getting all the screws out of the panel These should all be phillips head screws and the first one will be up top near the outside mirror corner towards the front of the door. There will be another one at the very bottom center of the door. You might have to get low and really look down at the bottom edge of the door panel to see it. The next one will be a for the door handle bezel. You should see it behind the chrome door handle. Once it's removed, pull the door handle where you need it to feed the bezel off of it. Once the bezel is out, you'll have a little bit of a cavity in the door panel now. There might be a big torx bit screw there that needs to come out. I believe this screw holds the door handle THAT YOU PULL THE DOOR CLOSE WITH to a metal support bracket. Just look in that area to be sure. If there isn't one there, there will definitely be one around the armrest pad area...like under it. Just know that there is a big torx bit screw somewhere in those areas, can't remember if it's just one or two. Going back up top, you'll need to pull away the seat belt cover at the top of the panel where the seat belt goes thru the panel. Once that cover is off, you'll see 2 screws there that need to come out. Maybe even one...I've seen GM just using one screw to hold that bezel down, it's hit or miss. That SHOULD be all the screws but double check. Step two - the door panel should now just be held on with plastic tabs, sort of like a Christmas tree looking plastic tab. Using the armrest pad/grab handle...pull it quickly away and it should break free from the door. Not all the way, but you'll just have to give it a quick, snappy, pull to get the panel to come free. If it doesn't, double check those areas where the torx bit screws might be. You'll have to fish the lower part of the seat belt thru the slot in the door to get the panel fully off. It's good to get new Christmas tree plastic tabs as well since some of those tabs might break when you start messing with the door panel. Your local auto parts store should have them. Step three - gently pull your power window/mirror/lock switch up out of the panel. It's held on with some really strong metal tension tabs and you'll just need to take your time and gently pry it away from the panel. I just used my fingers and absolutely make sure your nails are trimmed so that you don't scratch the panel face. Once it's out, you'll see those tension tabs I'm referring too. You'll have to remove the lock tabs for the connectors to the switch, I just use a small flat blade screwdriver. Wiggle the base of the connector out of the back of the switch...they'll be tough to pull as they're really in there. Some pics of when I did this. Disregard the bolt in this pic..it was incorrect and the phillips head screw is the correct one. You should have it as well unless someone before you messed it up or something. This is the door handle bezel. This is the support bracket for the armrest pad/pull handle. This is where that big torx bit screw lives. This is the secondary door handle cover. It will need to come out when you pull the large bezel around the handle off. It just slips out. A view of the door with the panel off for reference. Make sure the doors harness is fastened to the door. You'll have lots of rattling when going down the road if it's not secure.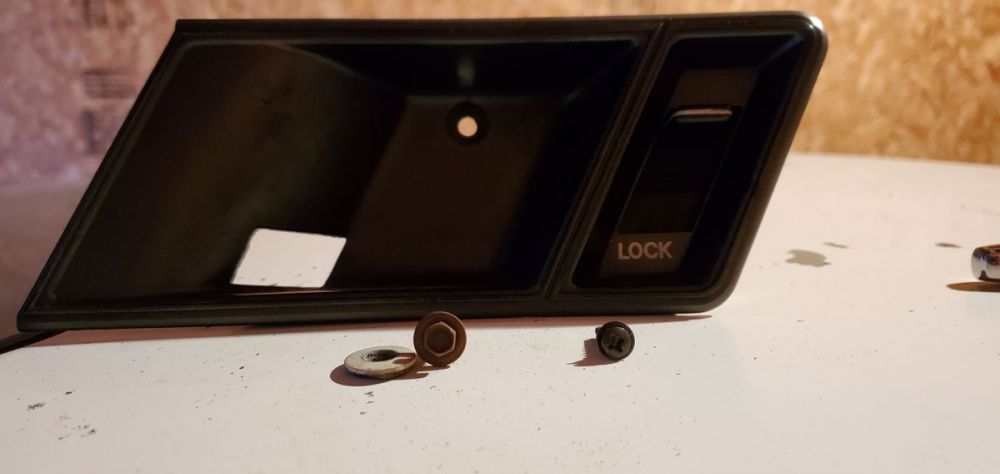

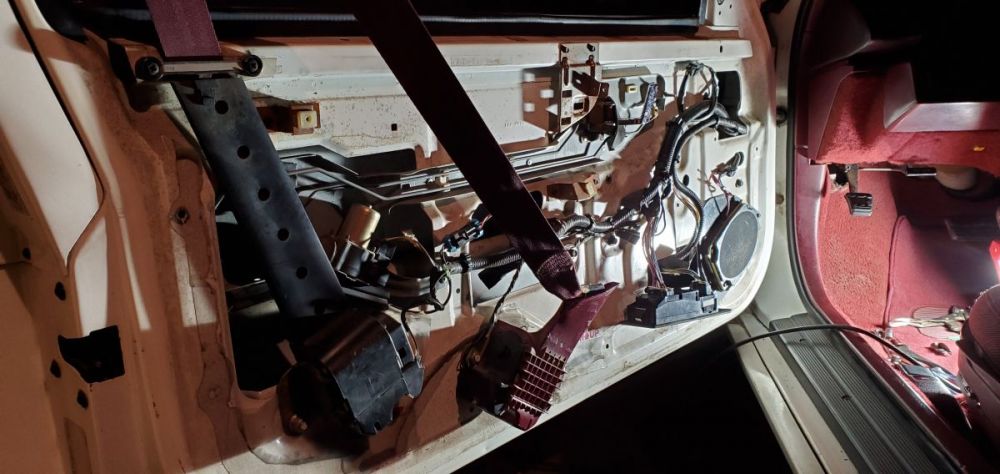 3 points
 -

Getrag 284/282 SS braided clutch hydrualics/bleeding procedure.
Go4DaMo and 2 others reacted to Mach 5 for a topic
Hey Jay! over 11 years later I am still using your write up! links all still work! Thanks! -Jarek3 points